Introduction to the Only Bread Machine Recipe
Why Making Bread at Home is a Game Changer
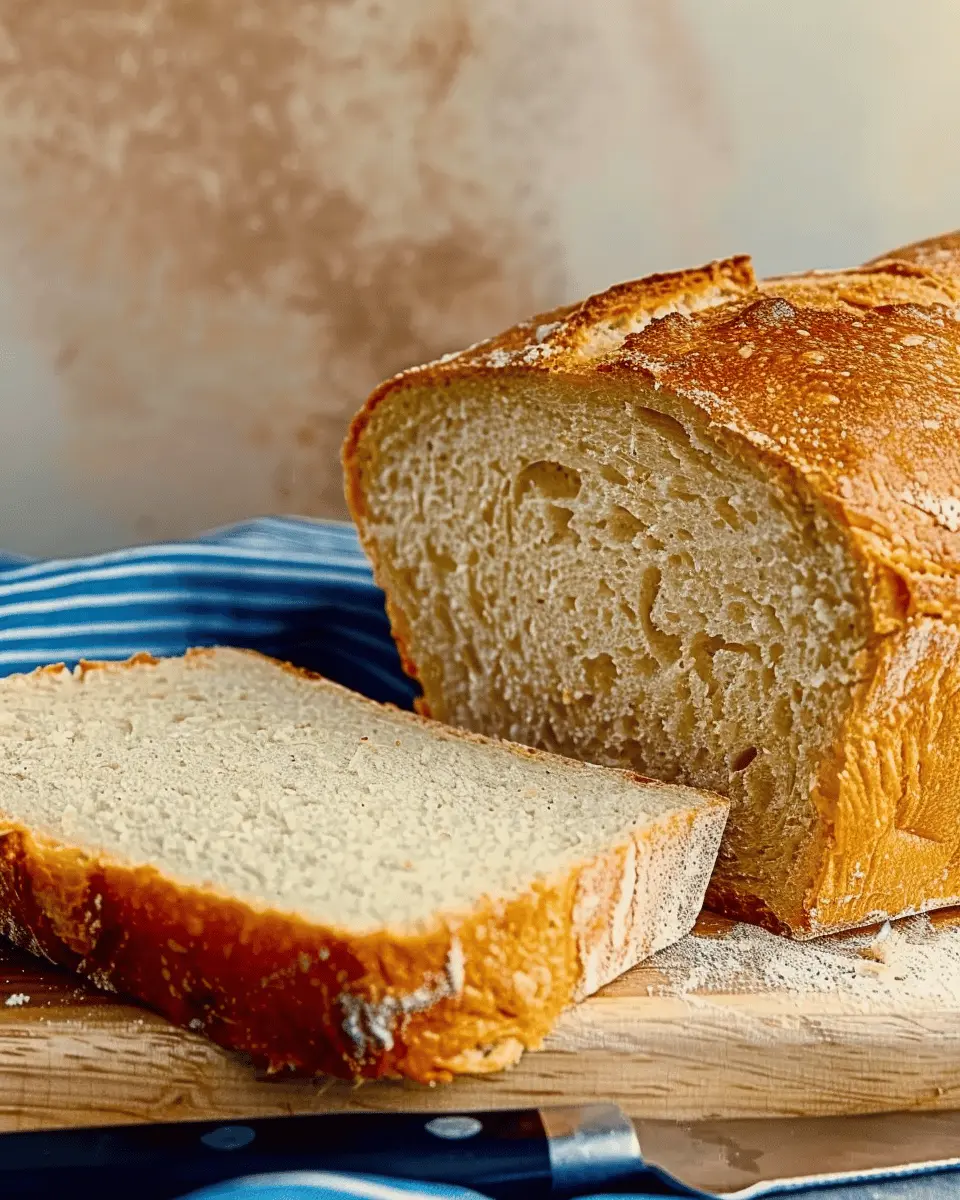
If you’ve ever wandered through the bakery aisle, inhaling the comforting scent of fresh bread, you know how enticing it can be. But have you ever thought about how satisfying it is to create that warm, crusty loaf in your own kitchen? Baking bread at home isn’t just a trend; it’s an experience that changes the way you enjoy your meals.
Imagine the moment you pull a freshly baked loaf out of your bread machine. The golden crust crackles as you slice into it, and the steam wafts up, filling your kitchen with a heavenly aroma. Nothing beats that feeling! Homemade bread can be tailored to your taste, whether you prefer a classic white loaf or something more adventurous like sourdough. Plus, you know exactly what ingredients are going into it—no fillers or preservatives, just wholesome goodness.
According to a study from the American Institute for Cancer Research, consuming more whole grains can reduce your risk for certain diseases, making your homemade breads not just delicious but beneficial too. When you know you’re serving nutritious bread to your family or guests, it adds an extra layer of warmth to your meals.
But let’s talk about convenience. The only bread machine recipe you’ll ever need simplifies the bread-making process, allowing you to create bakery-quality loaves with little effort. Simply toss in your ingredients, press a button, and let the machine do the rest. It’s like having a personal baker in your kitchen!
Plus, bread machines often come with various settings, enabling you to explore fun flavors and textures without the usual fear of failure that comes with traditional baking. Have you ever been daunted by the idea of kneading dough? With a bread machine, you can skip that step entirely!
Interested in elevating your meals even more? You can use your homemade bread for delightful sandwiches, special breakfasts, or as a simple evening dinner companion. You might want to explore options on how to make side dishes that pair perfectly with fresh bread—think homemade soups or fresh salads! Ready to dive into the details of your new favorite recipe? Let’s get started!

Ingredients for the Only Bread Machine Recipe
When you’re ready to whip up delicious homemade bread, having the right ingredients on hand is essential. The beauty of making bread in a machine lies in its simplicity, but quality matters! Let’s dive into what you need for the only bread machine recipe you’ll ever need.
Essential components for delicious homemade bread
-
Flour: Start with high-quality all-purpose flour for a well-structured loaf. You might even consider bread flour if you prefer a chewier texture.
-
Water: Use warm, filtered water to help activate the yeast. The temperature should be around 110°F (43°C) for optimal results.
-
Yeast: Active dry or instant yeast works best. Freshness is key here—old yeast won’t rise as effectively.
-
Salt: Don’t skip this! Salt enhances flavor and strengthens the dough.
-
Sugar: A touch of sugar nourishes the yeast, leading to deliciously risen bread. You can use honey or maple syrup as alternatives.
-
Oil: A little olive oil or melted butter adds richness and moisture, helping keep your bread soft.
-
Optional Add-Ins: Consider mixing in herbs, seeds, or even Turkey Bacon pieces to elevate your bread!
For more personalized tips on ingredient selection and bread-making techniques, check out this comprehensive guide on baking from King Arthur Baking Company. Happy baking!
Preparing the Only Bread Machine Recipe
Are you ready to embark on the delightful journey of making your own bread? Bread machines are a game-changer, making the process incredibly easy, even for those of us with a hectic lifestyle. With the only bread machine recipe you’ll ever need at your fingertips, let’s dive into the essential steps for crafting a delicious homemade loaf.
Step 1: Gather all ingredients
Before we start mixing and kneading, let’s make sure we have all the necessary ingredients handy. Here’s what you’ll need:
- Warm water (1 cup): This will help activate the yeast effectively.
- Sugar (2 tablespoons): A little sweetness goes a long way and aids in fermentation.
- Salt (1 teaspoon): Essential for flavor and stabilizing the dough.
- Oil (2 tablespoons): Choose olive oil or vegetable oil for a nice texture.
- Bread flour (3 cups): The foundation of your loaf; don’t substitute with all-purpose flour for the best results.
- Yeast (2 1/4 teaspoons, or one packet): Go for active dry yeast for optimal rising.
Having everything ready will streamline the process and ensure nothing gets forgotten. It can be frustrating to get halfway through and realize you’re missing an ingredient.
Step 2: Activate the yeast
Now that you have your ingredients laid out, it’s time to activate the yeast.
- Combine the warm water and sugar in a small bowl and stir gently until the sugar dissolves.
- Sprinkle the yeast on top and let it sit for about 5-10 minutes. You should see it begin to foam—this means your yeast is alive and kicking!
According to the experts at the American Society of Baking, yeast is a standout leavening agent that plays a crucial role in making your bread rise beautifully. If your yeast doesn’t foam, it could mean it’s expired, so don’t skip this step!
Step 3: Combine wet and dry ingredients
Moving on! Next, you’ll want to combine your wet and dry ingredients.
- In the bread machine pan, add the oil first, followed by the foamy yeast mixture.
- In a large bowl, combine the flour and salt. Once mixed, add this dry mixture into the bread machine pan, making sure to cover the liquid completely. This step helps prevent clumping.
It’s vital not to skip or swap the flour types unless specified—it really impacts texture. If you’re curious about how different flours behave, check out this article from King Arthur Baking for some great insights.
Step 4: Select the right bread setting
Most modern bread machines have various settings for different types of bread. For the only bread machine recipe, select the basic white bread setting—it’s perfect for this recipe.
- Ensure the crust setting is set to your preference (light, medium, or dark).
- Hit “Start” and let the bread machine do the magic!
Remember, while the machine does most of the work, this is when the irresistible smell of fresh bread will start to fill your kitchen, making it totally worth it.
Step 5: Cool and slice the bread
Once your bread is baked, it’s crucial to allow it to cool down properly.
- Carefully remove the bread pan from the machine using oven mitts (it will be hot).
- Let it sit for about 10-15 minutes before popping the bread out onto a wire rack.
- Allow it to cool completely before slicing, which helps ensure a better texture.
Slicing while still warm may seem tempting, but you risk ruining the loaf. Trust me on this—give it some time! And when the time is right, enjoy that first slice with some creamy butter or your favorite spread.
In summary, with these straightforward steps and your trusty bread machine, you’re well on your way to enjoying fresh, homemade bread. Your kitchen will soon become the bread haven you always dreamed of! For more insights on ingredient choices, check out Food52 or Bon Appétit, which offer excellent tips and tricks on bread-making. Happy baking!

Variations on the Only Bread Machine Recipe
Herb-infused Bread Option
If you’re looking to elevate the only bread machine recipe you’ve been mastering, consider incorporating herbs. Fresh or dried herbs can add incredible depth to your loaf. Imagine the savory flavors of rosemary, thyme, or basil wafting through your kitchen!
Here’s how to do it:
- Add Herbs Directly: Mix in about 2-3 tablespoons of your favorite herbs into the dry ingredients.
- Herb-Infused Oil: For an extra touch, you can use herb-infused olive oil in place of regular oil. Just a couple of tablespoons will work wonders.
- Cheese and Herbs: Why not sprinkle in some cheese like Parmesan or feta along with the herbs for a delightful twist?
This variation is perfect for pairing with soups or enjoying on its own. Plus, it’s an impressive dish to serve during any gathering!
For more ideas on seasoning your bread, check out resources from The Kitchn.
Whole Grain Bread Adaptation
Health-conscious bread lovers, rejoice! Adapting the only bread machine recipe to create a delicious whole grain loaf is simpler than you might think. Whole grain breads are not only nutritious but also bursting with flavor.
Steps to try:
- Flour Substitution: Replace half of the all-purpose flour with whole wheat flour. You can even experiment with other flours like spelt or rye.
- Add Seeds: Incorporate seeds like flax, chia, or sunflower for added nutrition and texture. Just ¼ cup of seeds should do.
- Increase Liquid: Because whole grain flour absorbs more moisture, add an additional tablespoon or two of water or milk.
This adaptation is ideal for the modern professional looking for wholesome meals without sacrificing taste. It’s great for sandwiches or as a base for Turkey Bacon and Chicken Ham breakfast options! For further reading on the benefits of whole grains, visit Healthline.
Experimenting with these variations will not only improve your bread-making skills but also keep your meals exciting and nutritious. Happy baking!
Cooking Tips and Notes for the Only Bread Machine Recipe
When it comes to the only bread machine recipe you’ll ever need, there are some common pitfalls and tips that can elevate your bread-making experience.
Common Pitfalls to Avoid
- Incorrect Yeast Usage: Always check the expiration date on your yeast. Fresh yeast means better rising, while old yeast can lead to dense, unsatisfying bread.
- Measuring Ingredients Accurately: Use a kitchen scale for precision. A little extra flour here or there can drastically alter your results. For more tips on measuring, check out this handy guide.
- Ignoring Room Temperature Ingredients: Ensure your liquids (like water or milk) are at room temperature. Cold ingredients can shock the yeast and hinder proper rising.
- Overmixing the Dough: While kneading is essential, too much mixing can lead to tough, chewy bread. Lightly knead until just combined, and let the machine handle the rest!
Incorporating these tips will ensure that your bread not only turns out perfectly every time but also brings a satisfying aroma to your kitchen, inviting you back for more! Happy baking!

Serving suggestions for the Only Bread Machine Recipe
Embracing the only bread machine recipe means indulging in warm, freshly baked bread that can complement a variety of meals. Here are some delightful ways to serve your homemade wonder!
Pairing bread with soups and salads
What better way to enjoy your bread than alongside a comforting bowl of soup or a vibrant salad? Here are some suggestions:
-
Soup: Whether it’s a creamy tomato basil bisque or a hearty chicken noodle, serve slices of your warm bread as the perfect dunking companion. The flavors meld beautifully, elevating your dining experience.
-
Salad: Opt for a refreshing Caesar salad or a zesty Mediterranean mix. The crusty exterior of your bread is perfect for scooping up dressing-laden greens.
-
Spreads: Enhance your meal with spreads like avocado, hummus, or even turkey bacon bits on top for added flavor. These toppings complement the bread’s texture and enhance every bite.
So go ahead, slice up that fresh loaf, and enjoy it with your favorite soups and salads. It’s a simple yet effective way to savor the incredible taste of your homemade bread! You can explore more pairing ideas at Food Network for inspiration.
Time breakdown for the Only Bread Machine Recipe
Preparation time
Getting started with the only bread machine recipe is a breeze. You’ll need about 15 minutes for preparation. This includes gathering your ingredients, measuring them out, and adding them to your bread machine. It’s a great moment to unwind and maybe listen to a podcast or enjoy a cup of coffee.
Baking time
Once your machine is all set, the magic begins! The baking time is approximately 3 hours. During this phase, you can relax, catch up on your favorite show, or even tackle a quick home project.
Total time
In total, you’re looking at 3 hours and 15 minutes from start to finish. In less time than a movie, you’ll be savoring freshly baked bread that not only fills your home with warmth but also brings a sense of accomplishment. For more cooking tips, check out America’s Test Kitchen.
Nutritional facts for the Only Bread Machine Recipe
When you’re whipping up the only bread machine recipe you’ll ever need, understanding its nutritional value can help you make the best choices for your health. Here’s a quick breakdown of the key figures:
Calories
One slice of this delightful homemade bread typically contains about 80 calories. It’s a satisfying option without the guilt, especially when you’re craving that warm, fresh-baked goodness.
Protein
With about 3 grams of protein per slice, this bread makes a great addition to meals. Pair it with your favorite spreads or toppings—like turkey bacon or chicken ham—to boost your protein intake further.
Sodium
Mindful of your sodium intake? Each slice has around 150 mg of sodium, which is manageable, especially compared to store-bought bread. You can adjust this by making substitutions or opting for low-sodium ingredients as needed.
Feel free to explore more about healthy eating habits, or dive into the nutritional guidelines offered by the USDA to ensure your diet stays on track! Remember, with good choices, every slice can be both delicious and nutritious.
FAQs about the Only Bread Machine Recipe
Can I adjust the recipe for different bread sizes?
Absolutely! The beauty of the only bread machine recipe is its versatility. Most bread machines allow you to select different loaf sizes—usually 1.5-pound or 2-pound loaves. If you’re using a different size, simply adjust the ingredient quantities according to your machine’s guidelines. For instance, if you’re looking to make a smaller loaf, use about 75% of the original recipe. Just remember to keep an eye on the dough during the mixing phase; it should be a slightly tacky ball.
What should I do if my bread isn’t rising?
If you find your bread isn’t rising, there could be a few culprits at play:
- Expired Yeast: Always check the expiration date. Fresh yeast is key to a perfect rise.
- Wrong Water Temperature: Yeast is sensitive—too hot or too cold water can hinder its performance. Aim for 100°F to 110°F for optimal activation.
- Humidity Levels: Your kitchen’s humidity can affect the dough’s consistency. On humid days, you may need slightly less water; on dry days, add a bit more flour if necessary.
For further troubleshooting, check out this helpful guide on yeast activation.
How do I store leftover bread?
Storing your bread correctly will keep it fresh for days. Here are some tips:
- Room Temperature: If you plan to eat it within 3-5 days, store your bread in a paper bag or wrapped in a clean kitchen towel.
- Freezing: For longer storage, slice the bread and wrap it tightly in plastic before placing it in an airtight freezer bag. When you want to enjoy it again, pop a slice in the toaster, and it’ll taste freshly baked!
By following these tips, you’ll make the most of the only bread machine recipe and always have delicious bread at hand.
Conclusion on the Only Bread Machine Recipe
Emphasizing the joy of homemade bread
There’s something truly heartwarming about creating your own bread at home. With the only bread machine recipe you’ll ever need, you’ll experience the delightful aroma wafting through your kitchen as it bakes. This recipe simplifies the process, allowing even the busiest individuals to enjoy fresh, warm bread without the hassle. Imagine pulling perfectly golden loaves from your bread machine; it’s like having a slice of happiness!
Homemade bread not only tastes better but also provides a sense of accomplishment that is hard to beat. So, why not treat yourself and your loved ones to this delicious experience? For more tips on bread baking, check out resources like The Bread Science. In the world of cooking, nothing compares to the joy of sharing something made from scratch. Happy baking!
PrintThe Only Bread Machine Recipe You’ll Ever Need for Irresistible Flavor

This bread machine recipe is guaranteed to deliver perfect, delicious bread every time.
- Prep Time: 10 minutes
- Cook Time: 3 hours
- Total Time: 3 hours 10 minutes
- Yield: 1 loaf 1x
- Category: Bread
- Method: Bread Machine
- Cuisine: American
- Diet: Vegetarian
Ingredients
- 3 cups bread flour
- 1 teaspoon salt
- 2 tablespoons sugar
- 1 tablespoon active dry yeast
- 1 cup warm water
- 2 tablespoons vegetable oil
Instructions
- Measure and add all ingredients into the bread machine in the order recommended by the manufacturer.
- Set the machine to the basic bread setting and start.
- Once the baking cycle is complete, carefully remove the bread from the pan and let it cool on a wire rack.
Notes
- For best results, use bread flour and ensure the yeast is fresh.
Nutrition
- Serving Size: 1 slice
- Calories: 150
- Sugar: 1g
- Sodium: 200mg
- Fat: 3g
- Saturated Fat: 0g
- Unsaturated Fat: 2g
- Trans Fat: 0g
- Carbohydrates: 28g
- Fiber: 1g
- Protein: 5g
- Cholesterol: 0mg
Keywords: bread machine, recipe, baking, homemade bread