Introduction to Homemade White Bread
When it comes to putting together quick, satisfying meals, homemade white bread is a true game changer for young professionals. After a long day of work, the last thing you want is to spend hours preparing dinner. Enter your trusty bread-making skills! Making your own white bread isn’t just about creating something delicious; it’s about embracing a ritual that can transform your everyday cooking experience.
Imagine walking into your kitchen, the smell of warm yeast and freshly baked bread wafting through the air. Not only is it comforting, but it’s also a way to disconnect and unwind. Baking can be a mindful escape from the hustle and bustle of work life, and it’s a simple yet effective way to impress friends at dinner parties or cozy get-togethers. Plus, when you bake your own bread, you know exactly what goes into it. Say goodbye to artificial preservatives and hello to wholesome ingredients!
A study from the American Journal of Clinical Nutrition indicates that home-cooked meals are typically healthier than dining out. This simple shift toward homemade food can even contribute to better overall well-being. And let’s not forget about the cost savings! Why spend $5 on a loaf of artisan bread from the bakery when you can spend just a few dollars on ingredients to make homemade white bread?
Now, let’s talk about versatility. Freshly baked white bread can serve as the foundation for quick breakfasts, delicious sandwiches, or even savory turkey bacon and chicken ham melts. The options are endless! Whether you’re slapping together a simple PB&J or diving into the world of gourmet sandwiches, homemade white bread will elevate your meal game.
So, are you ready to take your kitchen skills to the next level? Stick with us as we guide you through a straightforward recipe for homemade white bread. It’s not as intimidating as it sounds, and you’ll be surprised at how rewarding it feels to create something from scratch. You might just find that bread-making becomes your new favorite hobby!
For more tips on enhancing your cooking skills, check out Serious Eats and Food52. They offer tons of resources to make every meal a delightful creation.

Ingredients for Homemade White Bread
Essential ingredients for the perfect loaf
When crafting your own homemade white bread, you’ll want to gather a few foundational ingredients that bring life to your loaf. Here’s what you need:
- All-purpose flour: This is the backbone of your bread, providing structure and chewiness.
- Water: Vital for activating the yeast and hydrating the flour.
- Yeast: Instant or active dry yeast will do, helping your dough rise beautifully.
- Salt: Enhances flavor and controls the fermentation process.
- Sugar: A touch of sweetness that feeds the yeast and adds a hint of flavor.
- Butter or oil: For richness and a tender crumb, choose what you prefer.
These essentials create a basic bread that’ll make your kitchen smell heavenly. Interested in the science behind fermentation? Check out this great resource by King Arthur Baking.
Optional ingredients for flavorful tweaks
Once you’ve mastered the basic recipe, consider adding some optional ingredients to elevate your homemade white bread. Here are a few ideas:
- Milk: Swap water for milk for a softer crust and richer flavor.
- Herbs and spices: Try rosemary, garlic powder, or even a pinch of cinnamon for unexpected depth.
- Seeds or nuts: Adding sunflower seeds, walnuts, or even oats will provide delightful texture.
- Sweeteners: Substitute some sugar with honey or maple syrup for a unique twist.
These small additions can transform your loaf into an unforgettable delight, perfect for sandwiches or toasting!
Step-by-step Preparation of Homemade White Bread
Making homemade white bread might seem daunting, but I promise it’s a delightful experience well worth your time. There’s something inherently rewarding about kneading dough and watching it rise, and the aroma filling your kitchen will bring a smile to anyone’s face. Let’s roll up our sleeves and dive into the easy steps of preparing this delicious staple.
Prepare the dough
First things first, gather your ingredients. You’ll need:
- 4 cups all-purpose flour
- 2 teaspoons active dry yeast
- 1 ½ cups warm water (around 110°F)
- 2 tablespoons sugar
- 2 tablespoons salt
- 2 tablespoons olive oil
Start by mixing the warm water and sugar in a bowl, then sprinkle the active dry yeast on top. Let it sit for about 5-10 minutes until it’s frothy. This little step ensures your yeast is alive and kicking, which is crucial for that fluffy texture we all desire.
In another large bowl, combine the flour and salt. Once your yeast mixture is frothy, add it along with the olive oil to your flour mixture. Now, stir until everything comes together into a shaggy dough. It’s perfectly okay if it feels a little sticky; that’s what we want!
Knead the dough
Now it’s time to get your hands involved — kneading is where the magic happens! Sprinkle a little flour on a clean surface and turn your dough out. Use the heel of your hand to push the dough away from you, fold it back over itself, give it a quarter turn, and repeat. This method develops the gluten in the flour, leading to that characteristic chewiness.
Knead for about 8-10 minutes. If you want to impress your friends with your technique, consider testing the “windowpane” test: stretch a small piece of dough with your fingers; if it holds together and you can see light through it, you’re on the right track. As you knead, remember to keep the surface lightly floured to prevent sticking.
First rise
After kneading, place your dough in a large, greased bowl, covering it with a kitchen towel or cling film. Let it rise in a warm, draft-free place for about 1-2 hours or until it has doubled in size. This rising time allows the yeast to ferment, creating carbon dioxide that gives bread its airy texture.
For optimal rising, consider placing your bowl in an oven with just the light on. This creates a pleasantly warm environment while preventing drafts.
Shape and second rise
Once your dough has risen, gently punch it down to release the air. Turn it out onto a floured surface and divide it into two equal pieces for your loaves. Shape each piece into a loaf by flattening it into a rectangle and rolling it tightly from one end to the other.
Place the shaped loaves seam-side down in greased loaf pans. Cover them again and let them rise for another 30-45 minutes until they puff up nicely. This second rise will ensure your homemade white bread is light and fluffy.
Bake the loaves
The final step is perhaps the most rewarding — baking! Preheat your oven to 375°F (190°C). Once it’s heated, bake your loaves for about 25-30 minutes. They should be golden brown and sound hollow when tapped on the bottom. If you’re feeling a little adventurous, you can also brush them with melted butter right after they come out for an extra touch of richness.
Voilà! You’ve made your very own homemade white bread. The taste will be far superior to anything you can buy at the store, and the pride of making it yourself? Priceless. Enjoy it fresh or toasted with your favorite spreads, and don’t forget to share that enticing aroma with friends and family!
For tips on variations, you can check out resources such as The Kitchn or King Arthur Baking. Happy baking!

Variations on Homemade White Bread
When it comes to homemade white bread, there’s so much room for creativity! Why settle for the classic loaf when you can explore these delightful variations?
Wholesome Whole Wheat White Bread
If you’re keen on incorporating some whole grains without sacrificing that soft texture, try making a whole wheat white bread. Simply substitute a portion of the all-purpose flour with whole wheat flour—about 50% is a good start. Whole wheat flour brings added nutrition and fiber to your bread without overwhelming the flavor. For a smoother texture, consider using finely ground white whole wheat flour. This variation not only enhances the nutritional profile but also keeps the bread light and fluffy.
Herb-Infused White Bread
Looking to elevate your homemade white bread experience? Infuse it with aromatic herbs! Adding chopped fresh herbs like rosemary, thyme, or basil can transform an ordinary loaf into a fragrant, gourmet treat. Just mix in about 2 tablespoons of your chosen herbs into the dough during the kneading process. The result? A delightful loaf that pairs beautifully with soups, salads, or even as the base for gourmet turkey bacon sandwiches. For a burst of flavor, you can also add some garlic or even cheese.
With these variations, the possibilities are endless! Each approach can create a unique twist, making your baking adventures even more rewarding. So grab your apron, turn on your oven, and let your creativity rise—literally! For more inspiration, check out resources from the Bread Lab at Washington State University or King Arthur Baking for some expert tips.
Cooking Tips and Notes for Homemade White Bread
Common pitfalls and how to avoid them
Making homemade white bread can be rewarding, but a few common pitfalls can trip you up. One major challenge is not letting the dough rise enough. A good tip? Keep your dough in a warm, draft-free place to encourage its growth. Use a digital thermometer to check that your kitchen is around 75°F to 80°F, which is ideal for rising.
Another frequent issue is over-kneading. While it’s tempting to keep mixing, you’re aiming for a smooth, elastic dough—not a tough one. Remember, a well-hydrated dough is easier to handle, so don’t skimp on water!
Tips for using different types of flour
Not all flours are created equal! For lighter homemade white bread, stick with all-purpose flour, but if you want a more complex flavor, consider mixing in bread flour or even a bit of whole wheat flour.
- All-purpose flour: Great for a soft texture.
- Bread flour: Higher protein content promotes chewier crusts.
- Whole wheat flour: Adds a nutty flavor; consider replacing just ¼ of your all-purpose flour for a subtle change.
Curious about baking? Check out resources from the King Arthur Baking Company for expert tips that might spark your creativity!

Serving Suggestions for Homemade White Bread
Perfect pairings for your homemade bread
Your homemade white bread is a beautiful canvas for a variety of toppings and fillings. Consider classic pairings, such as:
- Turkey Bacon and Avocado: The crispness of turkey bacon complements the softness of the bread, while avocado adds creaminess.
- Chicken Ham and Swiss Cheese: This combo delivers a delightful balance of savory flavors, perfect for a quick sandwich.
- Peanut Butter and Banana: A nostalgic choice that packs a nutritious punch, ideal for breakfast or a snack.
Don’t forget to serve your bread warm, perhaps with a dollop of butter or a drizzle of honey for a treat.
Creative uses for leftover bread
If you find yourself with extra homemade white bread, fear not! There are plenty of delicious ways to use it up:
- Bread Pudding: Transform stale slices into a rich, comforting dessert.
- Croutons: Cube leftover bread, toss with olive oil, and bake for crunchy salad toppings.
- French Toast: Sliced bread makes for a divine breakfast classic when dipped in a mixture of eggs and milk.
By being creative, you can minimize waste while enjoying your bread in new and exciting ways. For inspiration on more ways to use up bread, check out this guide.
Time Breakdown for Homemade White Bread
When you’re ready to dive into making your own homemade white bread, it’s all about timing! Here’s how the process breaks down:
Preparation Time
Set aside about 15 minutes for gathering your ingredients and mixing the dough. This is when you can enjoy a good podcast or your favorite playlist in the background.
Rising Time
The real magic happens during rising—allow the dough to rest for about 1 to 1.5 hours. This is when the yeast does its job, so be patient! Grab a book or catch up on some episodes while you wait.
Baking Time
Once risen, baking takes just 25 to 30 minutes. A delicious aroma will fill your kitchen, making it hard to resist sneaking a slice or two!
Total Time
In total, plan for around 2 to 2.5 hours, including preparation, rising, and baking. Trust us, the reward is worth every minute! For more baking tips, check out the Bread Bakers Guild.
With these time estimates, you’re all set to bake your delightful homemade white bread—the perfect base for a tasty sandwich or serve it warm with some butter. Happy baking!
Nutritional Facts for Homemade White Bread
When you whip up a loaf of delicious homemade white bread, it’s essential to know what you’re nourishing your body with. Here’s a breakdown of some nutritional facts that might surprise you:
Calories
A typical serving of homemade white bread (one slice) contains around 80-100 calories. This can vary based on the ingredients you use, so keep that in mind when you’re slicing your masterpiece.
Carbohydrates
You’ll find that each slice packs about 15-20 grams of carbohydrates. These complex carbs are your body’s main source of energy, making your homemade white bread great for powering through your day.
Protein
In terms of protein, expect about 3 grams per slice. While not a significant source, it does contribute to your daily intake, especially when paired with protein-rich toppings like turkey bacon or chicken ham.
To dive deeper into the nutritional benefits of bread, check out this article from Healthline or explore more about fiber content on WebMD. Knowing what goes into your food can help you make more informed choices for a balanced diet. Enjoy baking!
Frequently Asked Questions about Homemade White Bread
Making delicious homemade white bread can be a rewarding experience, but you might have some questions. Here are answers to a few common inquiries!
How can I ensure my bread rises properly?
The key to a perfect rise is using fresh ingredients and keeping an eye on the temperature. Here’s what you can do:
- Check your yeast: Ensure it’s active by dissolving it in warm water (not hot!) with a little sugar. If it bubbles after 5–10 minutes, you’re good to go.
- Warm environment: When letting your dough rise, a warm spot can help. Try placing it in the oven with just the light on or covering it with a damp towel.
- Kneading: Proper kneading helps develop gluten, which traps gas and allows for a good rise. Aim for about 8–10 minutes of good kneading.
Can I freeze homemade white bread?
Absolutely! Freezing is a great option for preserving your homemade white bread. Once cooled, slice the loaf and wrap it tightly in plastic wrap or aluminum foil. Then, place it in a zip-top freezer bag. It should stay fresh for about three months. When you’re ready to enjoy it, simply thaw at room temperature or pop a slice in the toaster!
What are the best storage practices for homemade bread?
To keep your bread fresh longer, consider the following storage tips:
- Room temperature: Store your homemade white bread in a bread box or a sealed plastic bag for short-term storage (3-5 days).
- Avoid refrigeration: Though it may seem logical, the fridge can dry out bread.
- Freeze for longevity: As mentioned, slicing and freezing is a practical way to extend its life without sacrificing quality.
For more guidance on bread-making, check out resources on Serious Eats and King Arthur Baking. Happy baking!
Conclusion on Homemade White Bread
Taking the plunge into homemade white bread is not just about enjoying a delicious loaf; it’s about the joy of the process. Remember the inviting aroma wafting through your kitchen as you knead the dough? Each moment spent measuring, mixing, and waiting builds anticipation, creating a sense of accomplishment.
Homemade bread is a canvas, allowing you to experiment with flavors and textures. Plus, there’s something uniquely satisfying about slicing into a warm loaf that you’ve crafted with your own hands. So, gather your ingredients and embark on this delightful journey of bread-making! For tips and variations, check out resources like The Culinary Institute of America.
Enjoy the bread, share it, and relish the indoor adventures of baking!
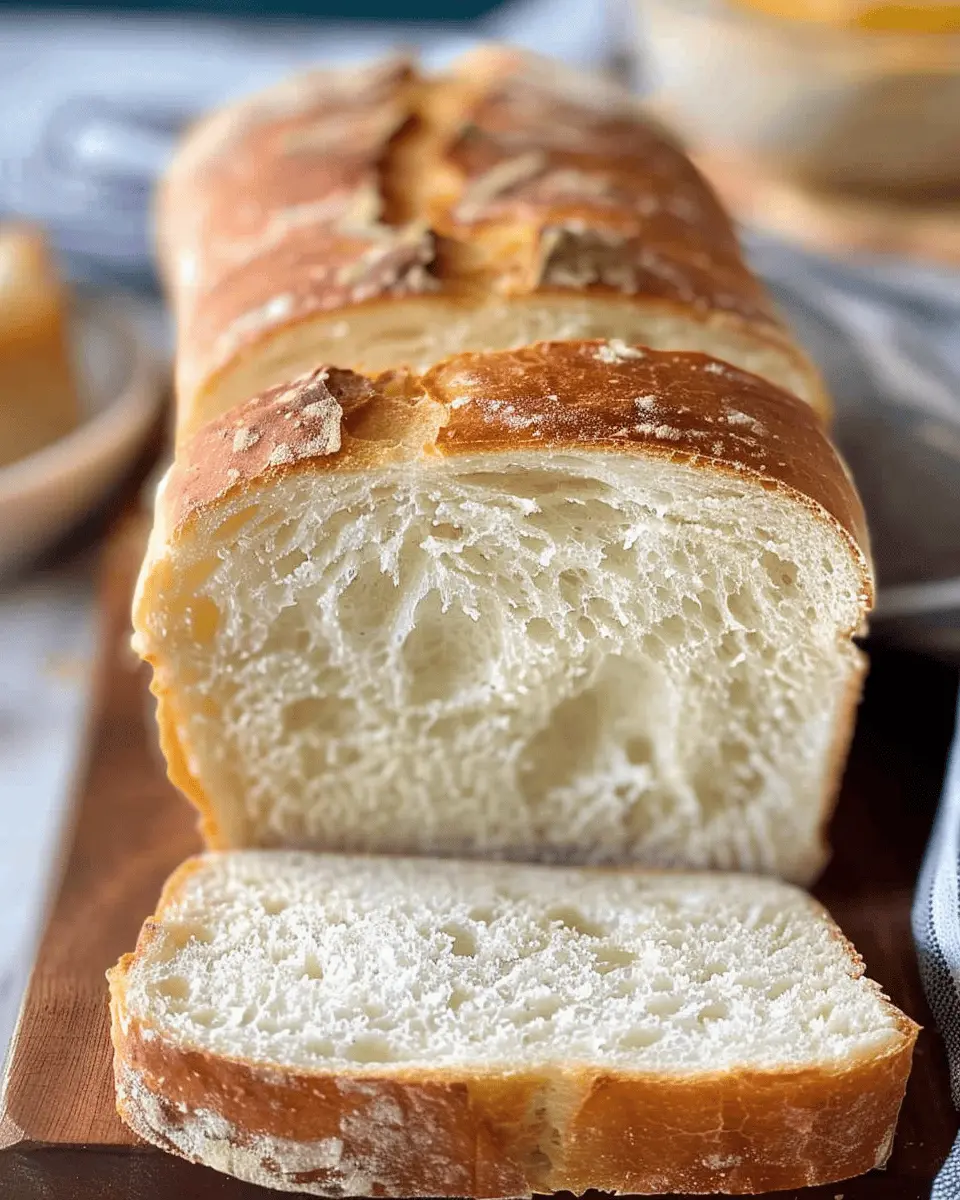
PrintHomemade White Bread: The Best Recipe for Soft, Fluffy Loaves

This homemade white bread recipe delivers soft, fluffy loaves that are perfect for sandwiches or to enjoy fresh out of the oven.
- Prep Time: 20 minutes
- Cook Time: 35 minutes
- Total Time: 1 hour 55 minutes
- Yield: 1 loaf 1x
- Category: Bread
- Method: Baking
- Cuisine: American
- Diet: Vegetarian
Ingredients
- 4 cups all-purpose flour
- 2 teaspoons salt
- 1 tablespoon sugar
- 2 1/4 teaspoons active dry yeast
- 1 1/2 cups warm water
- 2 tablespoons olive oil
Instructions
- In a large mixing bowl, combine warm water, sugar, and yeast. Let it sit for about 10 minutes until frothy.
- Add salt and olive oil to the yeast mixture. Gradually mix in the flour, one cup at a time, until a dough forms.
- Knead the dough on a floured surface for about 10 minutes, until smooth and elastic.
- Place the dough in a greased bowl, cover, and let rise until doubled in size, about 1 hour.
- Punch down the risen dough and shape it into a loaf. Place it in a greased loaf pan.
- Cover the pan and let the dough rise again for about 30 minutes.
- Preheat the oven to 375°F (190°C). Bake the bread for 30-35 minutes, or until golden brown.
- Let the bread cool in the pan for 5 minutes, then transfer to a wire rack to cool completely.
Notes
- For a richer flavor, you can use bread flour instead of all-purpose flour.
- Store bread in a plastic bag at room temperature to keep it fresh.
Nutrition
- Serving Size: 1 slice
- Calories: 120
- Sugar: 1g
- Sodium: 210mg
- Fat: 2g
- Saturated Fat: 0.5g
- Unsaturated Fat: 1g
- Trans Fat: 0g
- Carbohydrates: 22g
- Fiber: 1g
- Protein: 4g
- Cholesterol: 0mg
Keywords: Homemade White Bread, Soft Bread, Fluffy Loaf