Introduction to Sourdough Bread Perfect Every Time
When it comes to baking, sourdough bread is a delightful twist that combines both tradition and flavor into your culinary arsenal. As a young professional, you might find yourself spending long hours juggling work, social life, and perhaps even hobbies. So, why not impress your friends or unwind at home with a homemade loaf that has rich flavor and a wonderful texture? Here’s why making sourdough bread can be a game-changer for you.
Why Sourdough Bread is a Game-Changer for Young Professionals
First of all, sourdough bread holds a special place in culinary circles not just for its taste but also for its health benefits. Studies have shown that sourdough fermentation can enhance the digestibility of the bread and lower its glycemic index, making it a healthier alternative compared to commercial bread (source: Harvard Health). So, every slice you enjoy is a little gift to your gut health.
But let’s talk about the process. Traditional sourdough bread-making can seem intimidating, but I promise, it becomes meditative once you get the hang of it! The key lies in patience and love—two things we often have in abundance but forget to nurture in our busy lives. Imagine waking up to the smell of freshly baked sourdough, knowing you crafted it yourself. Quite the morning win, right?
Another perk? Sourdough is surprisingly forgiving. Wet dough? No problem! Over-proofed? You can still save it! This flexibility makes it perfect for young professionals who may not have the time to invest meticulously in every step. If you follow the guidelines in this article, you’ll find yourself achieving sourdough bread perfect every time.
Lastly, sourdough also opens up a world of creativity. You can experiment with flavors by adding herbs, cheese, or even nuts—tailoring each loaf to your preference. The sky (or your taste buds) is the limit!
So, roll up those sleeves and get excited. Your journey towards making sourdough that not only tastes great but looks stunning starts here. Who knew that your next big culinary adventure could be this easy and enjoyable? Let’s dive into the ingredients and techniques that will ensure your success with each batch!
Ingredients for Sourdough Bread
Creating sourdough bread perfect every time starts with understanding what goes into your loaf. Here’s a simple guide to the essential ingredients:
Levain Ingredients
Levain is the heart of your sourdough, giving it that unique flavor and texture. To make your levain, you’ll need:
- Flour: Choose a high-protein flour, like bread flour or a mix of whole wheat and all-purpose for depth of flavor.
- Water: Filtered or bottled water is best to avoid any additives that could inhibit fermentation.
- Sourdough Starter: A bubbly, active starter will ensure your levain is lively. If you’re new to this, check out resources like King Arthur Baking for tips on maintaining a starter.
Main Dough Ingredients
Once your levain is ready, it’s time to mix up the main dough. This includes:
- Levain: Your bubbly mixture from above.
- Water: Around 75% hydration is ideal for a moist crumb.
- Flour: Again, a combination of bread flour and whole wheat works wonders.
- Salt: A key player that enhances flavor and strengthens the dough.
Ready to craft that delicious sourdough? This foundational knowledge is your first step to success. For more insights on ingredient choices, check out this guide from MasterClass for expert advice!
Step-by-Step Preparation of Sourdough Bread
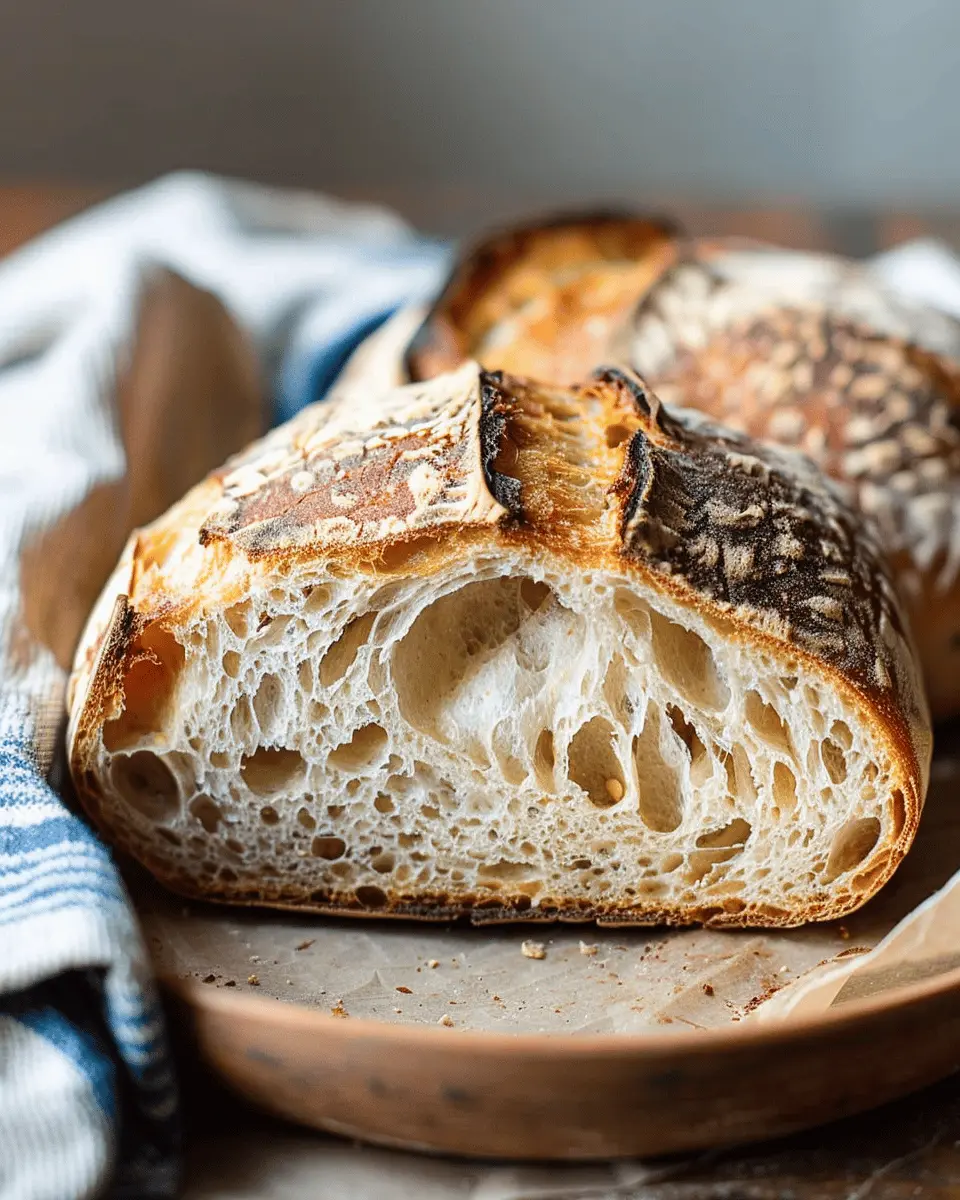
Sourdough bread has a magical way of bringing warmth and comfort into our kitchens. The delightful tang of the bread paired with a crispy crust and chewy interior makes for an experience that’s hard to beat. Have you been on the sourdough journey and want to ensure your results are nothing short of spectacular? Let’s dive into the step-by-step process to achieving sourdough bread perfect every time, ensuring you can impress even the pickiest of eaters!
Prepare the Levain
The foundation of great sourdough starts with an active levain. This is essentially a sourdough starter, but you’ll want it to be fresh and bubbly.
- Ingredients: Combine equal parts of flour and water from your starter. A typical measure is 50g of each.
- Mix: Stir well until fully incorporated.
- Rest: Let it bubble and flourish at room temperature for about 4-6 hours.
This cultivation process is crucial; it ensures that you have a robust starter that can easily ferment the dough.
Autolyse the Flour Mixture
Next, we want to kickstart the formation of gluten in our dough, which leads to that perfect chewy structure we love.
- Combine Ingredients: In your mixing bowl, throw in your bread flour and water (the amounts depend on your recipe, but typically about 500g of flour and 350g of water).
- Mix Gently: You don’t need to knead yet; just gently mix until there are no dry bits.
- Rest: Cover the bowl and let it sit for about 30 minutes to an hour. This “autolyse” phase hydrates the flour and makes the dough smoother.
The fermentation does wonders for flavor development, so don’t skip this step!
Mix the Dough Ingredients
After the autolyse, it’s time to add the remaining ingredients.
- Add Levain and Salt: Integrate your levain and about 10g of salt into the flour mixture.
- Knead: Knead or use the stretching and folding method, which helps to incorporate air and strengthen the dough. This could take about 10-15 minutes.
You might be wondering why we wait to add the salt; it helps control the fermentation and strengthens the dough networks.
Bulk Fermentation Process
Now comes the magic of fermentation! During this stage, the dough will rise and develop flavor.
- Cover and Relax: Place the dough in a bowl and cover it. Let it sit at room temperature for approximately 4-6 hours.
- Stretch and Fold: Every 30-60 minutes, stretch and fold the dough to help build gluten structure. You can do this 3-4 times during the bulk fermentation.
Keep an eye on your dough—it should double in size, become lighter, and show bubbles on the surface.
Divide and Pre-shape
Once your dough has completed its bulk ferment, it’s time for shaping!
- Divide: Gently turn the dough out onto a floured surface and divide it into your desired loaf sizes (usually around 800g for a standard loaf).
- Pre-shape: Gently shape the dough into rounds. Let them rest for about 20-30 minutes covered with a towel.
This resting period allows the gluten to relax and makes the final shaping easier.
Shape the Dough for Proofing
Now that the dough is rested, it’s time to give it its final shape.
- Final Shape: Shape the pre-shaped dough into your desired style, whether that be a round loaf or batard. You want it tight, so use your hands to create tension on the surface.
- Proofing Basket: Place your shaped dough into a floured proofing basket with the seam side up.
This process will help maintain the shape during the final rise.
Overnight Proof in the Refrigerator
For the most flavor and texture, let’s give the dough a slow fermentation.
- Chill Out: Cover the proofing basket with a towel or plastic wrap and place it in the refrigerator for 12-14 hours.
Not only does this extend the fermentation, but it also enhances the flavor and makes the dough easier to score before baking.
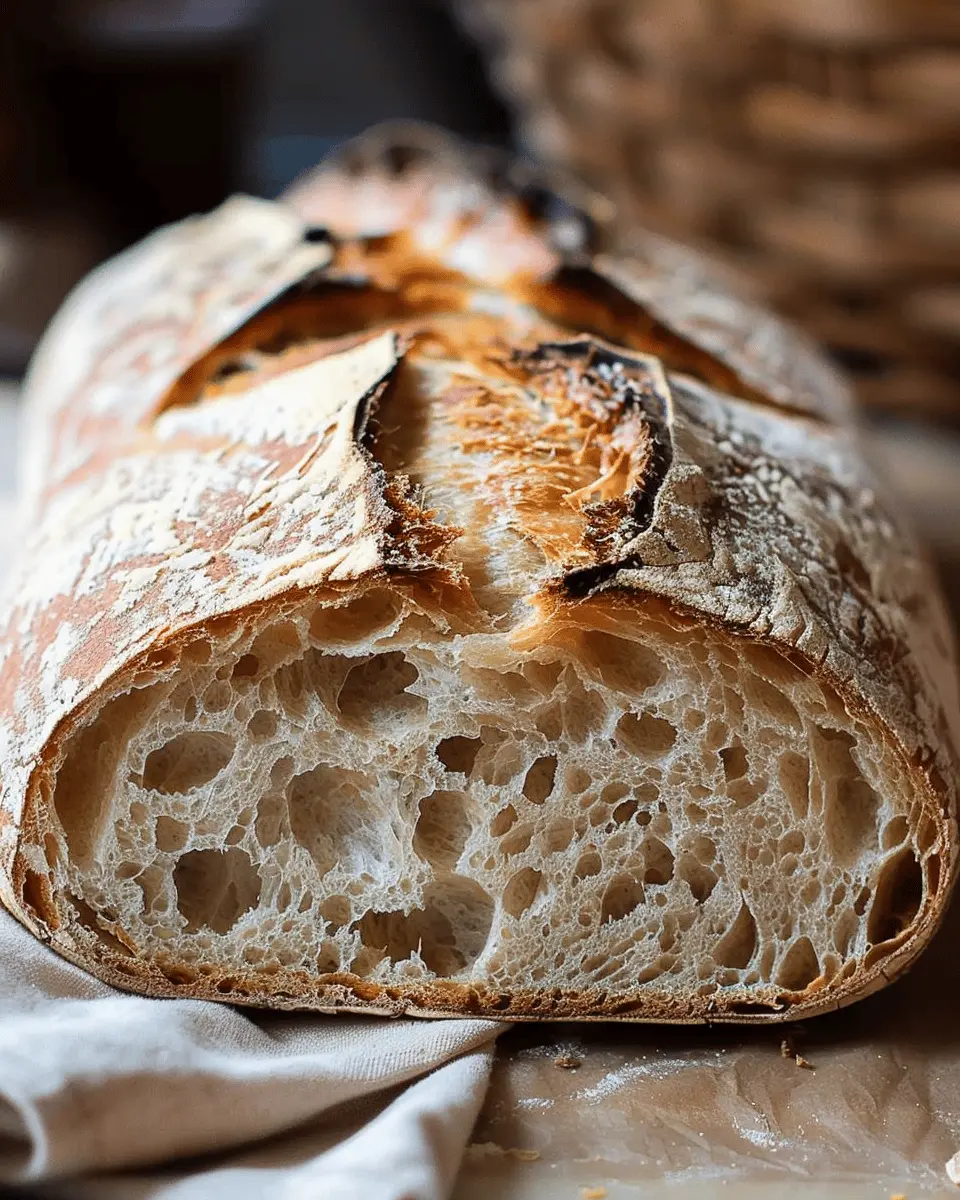
Baking the Perfect Sourdough Bread
Now we’ve arrived at the baking stage—where all that hard work turns into a loaf of sourdough bread.
- Preheat Oven: Preheat your oven to 450°F (230°C) with a Dutch oven inside to create steam.
- Score the Dough: Carefully turn your chilled dough onto parchment and score it with a sharp knife or blade—this will allow for controlled expansion during baking.
- Bake: Transfer the dough into the hot Dutch oven and cover it. Bake for 30 minutes with the lid on, then remove the lid and bake for an additional 15-20 minutes until golden brown.
The moment you pull that bread from the oven is pure bliss—let it cool before slicing. There you have it, your guide to making sourdough bread perfect every time. With practice and patience, you’ll be the neighborhood sourdough expert in no time!

Variations on Sourdough Bread
Add-Ins for Flavor
When you’re perfecting your sourdough bread recipe, don’t be afraid to get creative with add-ins! Incorporating nuts, seeds, and fresh herbs can elevate your loaf from basic to extraordinary. Here are some delightful choices:
- Nuts: Walnuts or pecans add a lovely crunch and deep flavor.
- Seeds: Sunflower seeds or pumpkin seeds provide both texture and nutrition.
- Herbs: Fresh rosemary or thyme can lend an aromatic touch that pairs beautifully with the tangy sourdough.
For some inspiration, consider checking out this article on flavor pairings that explores various ingredient combinations.
Different Shapes: Boule vs. Batard
The shape of your sourdough can significantly impact its appearance and texture. The most popular shapes are boule and batard, each with its unique characteristics:
-
Boule: This round shape is often associated with traditional artisan sourdough. It tends to have a thicker crust, making it great for those who enjoy a robust texture. Its shape is perfect for mopping up soups or sauces.
-
Batard: This elongated loaf is somewhat flatter than the boule. The batard creates a higher crumb-to-crust ratio, providing a softer bite. It’s excellent for sandwiches, especially with hearty fillings like turkey bacon or chicken ham.
Whichever shape you choose, remember that with the right techniques, you can make your sourdough bread perfect every time. Happy baking!
Cooking Tips and Notes for Sourdough Bread
Importance of Hydration
When it comes to making sourdough bread perfect every time, hydration is key! A well-hydrated dough creates a delightful crumb and a crispy crust. Typically, a hydration level of 70% to 80% is ideal for home bakers. But don’t be overwhelmed; start with 70% and adjust as you gain confidence. Remember, the wetter the dough, the better the final texture, but it can be trickier to handle.
Tools to Simplify the Process
Investing in a few essential tools can dramatically improve your sourdough experience. Here’s what you might consider:
- Digital kitchen scale: Accuracy is crucial. Measuring ingredients by weight ensures consistency in your dough.
- Dough scraper: This handy tool makes kneading and shaping much easier.
- Dutch oven or baking stone: These help retain heat and moisture, giving your bread that sought-after burst in the oven.
Want more tips? Check out sources like King Arthur Baking for expert resources on sourdough techniques!
Serving Suggestions for Sourdough Bread
Best Ways to Enjoy Sourdough
When you master the art of baking sourdough bread perfect every time, you’ll find endless ways to use this versatile loaf. Toasting is a fantastic option to bring out its crusty exterior and warm, chewy inside. Top your toasted slices with creamy avocado, a sprinkle of salt, and a drizzle of olive oil for a delicious brunch treat. Or, whip up a classic sandwich packed with grilled veggies and turkey bacon, making it an instant crowd-pleaser.
Pairing Ideas with Dips and Spreads
Looking for something a bit more indulgent? Pair your sourdough with tasty dips and spreads. Think rich hummus and roasted red pepper dip, or a tangy spinach and artichoke spread. For those moments when you want to snack, a homemade olive tapenade adds a Mediterranean flair and a burst of flavor. And don’t forget a simple butter spread with herbs!
Discover how these components complement your sourdough on pages like Bon Appétit or check Taste of Home for variations that excite your palate!
Time Breakdown for Sourdough Bread
Preparation Time
The initial prep work for sourdough bread perfect every time usually takes about 30 minutes. This includes measuring out your ingredients, mixing the dough, and giving it a gentle knead. It’s a great time to play your favorite podcast or light a cozy candle—because baking is all about creating an inviting environment!
Fermentation and Proofing Time
This stage is where the magic happens. Allow your dough to undergo fermentation for at least 4-8 hours. During this time, the natural yeast works its wonders, contributing to that delightful flavor. Once it has risen, the proofing phase typically takes another 1-2 hours. So, grab a book or enjoy some Turkey Bacon while you wait!
Baking Time
Finally, the moment of truth. Preheat your oven and then bake your sourdough for about 30-40 minutes. The result? A crusty, golden loaf that’s bound to impress! The aroma will fill your kitchen, making the wait more than worth it. For expert tips on achieving the perfect crust, check out resources like King Arthur Baking or Breadtopia.
Remember, each step is essential to achieving that perfect sourdough bread—so take your time and enjoy the process!
Nutritional Facts for Sourdough Bread
Calories per Slice
Sourdough bread is not only delicious but also offers a satisfying option in terms of calories. Generally, one slice of sourdough bread contains around 80 to 100 calories. This makes it a relatively low-calorie bread choice, especially when compared to other varieties. If you’re crafting your sourdough bread perfect every time, it’s essential to keep portion sizes in mind, as toppings can add up.
Fiber and Protein Content
When it comes to nutrition, sourdough bread shines with its fiber and protein content. Each slice typically provides about 2 grams of fiber and 3 grams of protein. Consuming fiber is crucial for digestive health, while protein is vital for muscle repair and overall wellness. A well-made sourdough can support your dietary goals if you’re aiming for a balanced diet. Curious about how sourdough improves digestion? Check out this article on fermentation benefits for more insights.
Exploring sourdough is a delightful journey, and knowing its nutritional value only enhances that experience. As you savor your homemade loaf, you’ll appreciate not just the flavor but also the wholesome goodness that comes with each slice!
FAQs about Sourdough Bread
How do I know my sourdough is ready to bake?
Determining when your sourdough is ready can be a bit of an art. A good rule of thumb is to look for dough that has doubled in size and holds a dome shape. You can also do the “poke test”: gently poke the dough, and if it springs back slowly, that’s a sign it’s ready. Remember, a sourdough bread perfect every time depends on not just the appearance but the feel of your dough, too. If you’re keen on diving deeper into the science, check out resources from the King Arthur Baking Company.
Why is my sourdough dense?
A dense sourdough can be disheartening! Common culprits include under-proofing, insufficient gluten development, or too much flour. Ensure that you’re incorporating enough air during kneading or folding—this helps create a light structure. Additionally, be mindful of hydration levels; increasing water can lead to a lighter crumb. If you’re curious about dough hydration percentages, articles on Breadtopia provide excellent insights!
Can I use whole wheat flour in my sourdough?
Absolutely! Whole wheat flour adds a nutty flavor and extra nutrition to your sourdough. Just keep in mind that it absorbs more water, so you might need to adjust your hydration levels. Experimenting with whole grain flours can lead to delightful variations of your classic sourdough. If you’re looking for tips on balancing whole wheat with other flours, the experts at Lehem Leader have some great advice.
Feel free to reach out with any more questions about your sourdough journey!
Conclusion on Sourdough Bread Perfect Every Time
Embracing Homemade Sourdough for a Healthier Lifestyle
Creating sourdough bread perfect every time isn’t just a culinary achievement; it’s a step toward a healthier lifestyle. By using simple, wholesome ingredients, you can tailor your bread to suit dietary preferences while reaping the benefits of fermentation, which enhances digestion and nutrient absorption.
Imagine the pride of serving your homemade loaf to friends and family, knowing that you control every ingredient. Plus, sourdough has a unique flavor that store-bought versions simply can’t replicate. If you want to explore further, check out resources from the Sourdough School and elevate your baking skills even more. So, put on that apron and start your sourdough journey—your health and taste buds will thank you!
PrintSourdough bread perfect every time: A Simple Guide for Success
Learn how to make sourdough bread that turns out perfect every time with this simple guide.
- Prep Time: 30 minutes
- Cook Time: 30 minutes
- Total Time: 7 hours
- Yield: 1 loaf 1x
- Category: Bread
- Method: Baking
- Cuisine: American
- Diet: Vegetarian
Ingredients
- 2 cups all-purpose flour
- 1 cup sourdough starter
- 1 cup water
- 1 teaspoon salt
Instructions
- In a large bowl, combine the flour and salt.
- In another bowl, mix the sourdough starter and water until well combined.
- Gradually add the wet ingredients to the dry ingredients, stirring until a dough forms.
- Knead the dough on a floured surface for about 10 minutes.
- Place the dough in a greased bowl, cover it, and let it rise for 4-6 hours.
- Preheat the oven to 450°F (232°C).
- Shape the dough and place it on a baking sheet, let it rest for 30 minutes.
- Bake for 25-30 minutes or until golden brown.
Notes
- For best results, use a kitchen scale to measure your ingredients.
- Experiment with different types of flour for varied flavors.
Nutrition
- Serving Size: 1 slice
- Calories: 150
- Sugar: 0g
- Sodium: 300mg
- Fat: 3g
- Saturated Fat: 0g
- Unsaturated Fat: 2g
- Trans Fat: 0g
- Carbohydrates: 30g
- Fiber: 1g
- Protein: 5g
- Cholesterol: 0mg
Keywords: Sourdough bread, perfect sourdough, baking bread