Introduction to No Fryer Homemade Donuts
The Rise of Homemade Donuts in a Fast-Food World
In today’s fast-paced lifestyle, where convenience seems to be king, there’s a delightful trend emerging—homemade donuts. Have you ever craved that fluffy, sweet goodness but felt guilty about indulging in store-bought treats? Enter no fryer homemade donuts, your guilt-free answer to satisfying that sweet tooth without the heaviness that often accompanies deep-fried options.
The beauty of making donuts at home is the ability to control the ingredients. You can swap out white sugar for coconut sugar, choose whole wheat flour over all-purpose, or even incorporate healthier toppings like cocoa nibs or nuts. According to the U.S. Department of Agriculture, Americans consume an average of 20 donuts per person every year. Writing this, I can’t help but wonder—how many of those were made at home, fresh from the oven?
What’s more appealing than the idea of indulging in freshly baked donuts while knowing exactly what’s in them? This trend not only embraces a healthier lifestyle but also celebrates creativity. Imagine whipping up a batch of warm donuts on a Sunday morning, aroma wafting through your kitchen, and the excitement of sharing them with family and friends. Who wouldn’t want to partake in such a delightful ritual?
With so many resources available online, making your own treats is more accessible than ever. Websites like Serious Eats and The Kitchn provide splendid tips and techniques that simplify the baking process, especially for those new cooks out there.
No fryer homemade donuts not only allow for culinary expression but also foster a sense of community. This makes it a perfect activity for family gatherings or even virtual get-togethers. Just think about how much fun it would be to have a virtual donut-making party, sharing your creations with friends over a video call!
In a world bustling with fast food and endless options, taking a moment to create something delicious at home can be a nourishing experience for both the body and the soul. So, roll up your sleeves, and let’s dive into the wonderful world of making no fryer homemade donuts! They’re not just a treat; they’re an experience waiting to be crafted.
Ingredients for No Fryer Homemade Donuts
Making No Fryer Homemade Donuts is not only simple, but it’s also a fun activity that’ll satisfy your sweet tooth without the guilt of frying. Let’s gather our ingredients and get those taste buds tingling!
Essential Ingredients
To whip up these delightful donuts, you’ll need the following ingredients:
- 2 cups all-purpose flour: This is the foundation of our donuts, providing the perfect texture.
- 3/4 cup granulated sugar: For that lovely sweetness that will make each bite heavenly.
- 2 teaspoons baking powder: This will help our donuts rise beautifully.
- 1/2 teaspoon salt: A crucial ingredient to enhance all the flavors.
- 1/2 teaspoon ground nutmeg: Just a hint of warmth that elevates the taste.
- 1 large egg: For binding and richness.
- 3/4 cup milk: This adds moisture and softens the dough.
- 2 tablespoons melted butter: To give our donuts that rich, buttery flavor.
Feel free to experiment with toppings as well! Consider glaze alternatives like chocolate or vanilla icing, or try using sprinkles for a fun flair. With these straightforward ingredients, you’re closer to tasting delicious homemade donuts that are guilt-free—but still oh-so-satisfying! For more inspiration, check out our favorite donut toppings for a creative spin!
Preparing No Fryer Homemade Donuts
Homemade donuts can be a delightful treat that brightens your day. Making No Fryer Homemade Donuts might feel a bit daunting at first, but believe me, it’s easier than you think! Plus, these baked beauties come out fluffy and delicious without the mess of frying. Let’s break down the process step-by-step, so you can create these mouthwatering desserts with ease.
Gather Your Ingredients
Before diving into any recipe, preparation is key. For our No Fryer Homemade Donuts, stock up on the following:
-
Dry Ingredients:
-
2 cups all-purpose flour
-
3/4 cup granulated sugar
-
2 tsp baking powder
-
1/2 tsp salt
-
1/2 tsp nutmeg
-
Wet Ingredients:
-
1 large egg
-
1/2 cup milk (or a dairy-free alternative)
-
1/4 cup unsalted butter, melted
-
1 tsp vanilla extract
-
For the Glaze (optional but warmly recommended):
-
2 cups powdered sugar
-
3-4 tablespoons milk
-
1 tsp vanilla extract
Make sure you have all the ingredients at your fingertips, so you won’t need to scramble mid-recipe!
Mix the Dry Ingredients
In a large mixing bowl, whisk together all your dry ingredients: flour, sugar, baking powder, salt, and nutmeg. This step is crucial as it helps to ensure that your donuts will have a homogenous texture and flavor. Pro tip: A whisk is great for aerating your dry ingredients, helping to achieve light and fluffy donuts.
Combine Wet Mixtures
In a separate bowl, combine your wet ingredients: the egg, milk, melted butter, and vanilla extract. Whisk them together until you have a smooth mixture. This is where your donuts will start to take shape!
Create the Dough
Pour the wet mixture into your dry ingredients. Mix gently with a spoon or spatula until just combined. Make sure not to overmix—it’s okay if the dough is slightly lumpy. Overmixing can lead to dense donuts, and we’re aiming for that perfect, soft texture.
First Rise of the Dough
After forming your dough, cover the bowl with a clean kitchen towel or plastic wrap. Let it sit for about 1 hour in a warm place. During this time, your dough will rise and develop those airy pockets we love in donuts. If you’re interested in the science of rising dough, Visit Serious Eats for some fascinating insights.
Chill the Dough Overnight
For maximum flavor and ease of handling, refrigerate the dough overnight. This chill time not only makes your donuts tastier but also easier to shape.
Shape the Donuts
Once your dough has chilled, it’s time to roll it out! On a floured surface, gently roll out the dough to about 1/2 inch thick. Use a donut cutter or two round cookie cutters of different sizes to cut out your donut shapes. Don’t forget to save any scraps—re-roll and cut them for additional mini donuts!
Second Rise Before Baking
Place your shaped donuts onto a baking sheet lined with parchment paper. Cover them again and let them rise for another 30 minutes. This step is crucial for achieving that fluffy texture in your No Fryer Homemade Donuts.
Bake Your Delicious Donuts
Preheat your oven to 375°F (190°C) and bake your donuts for 10-12 minutes, or until they’re lightly golden. Keep an eye on them, as every oven is slightly different.
Add the Glaze
Once cooled, it’s time for the best part—glazing! In a small bowl, mix your powdered sugar, milk, and vanilla extract until smooth. Dunk each donut into the glaze, and let any excess drip off. You can also add some sprinkles or crushed nuts for that extra flair!
And there you have it—a complete guide to making delicious and fluffy No Fryer Homemade Donuts. Treat yourself, your friends, or family to these delightful baked goodies that are sure to impress. Enjoy!

Variations on No Fryer Homemade Donuts
Looking to elevate your No Fryer Homemade Donuts game? You’re in for a treat! With just a few tweaks to your base recipe, you can create a variety of mouth-watering donuts that cater to every palate. Let’s dive into some delicious variations!
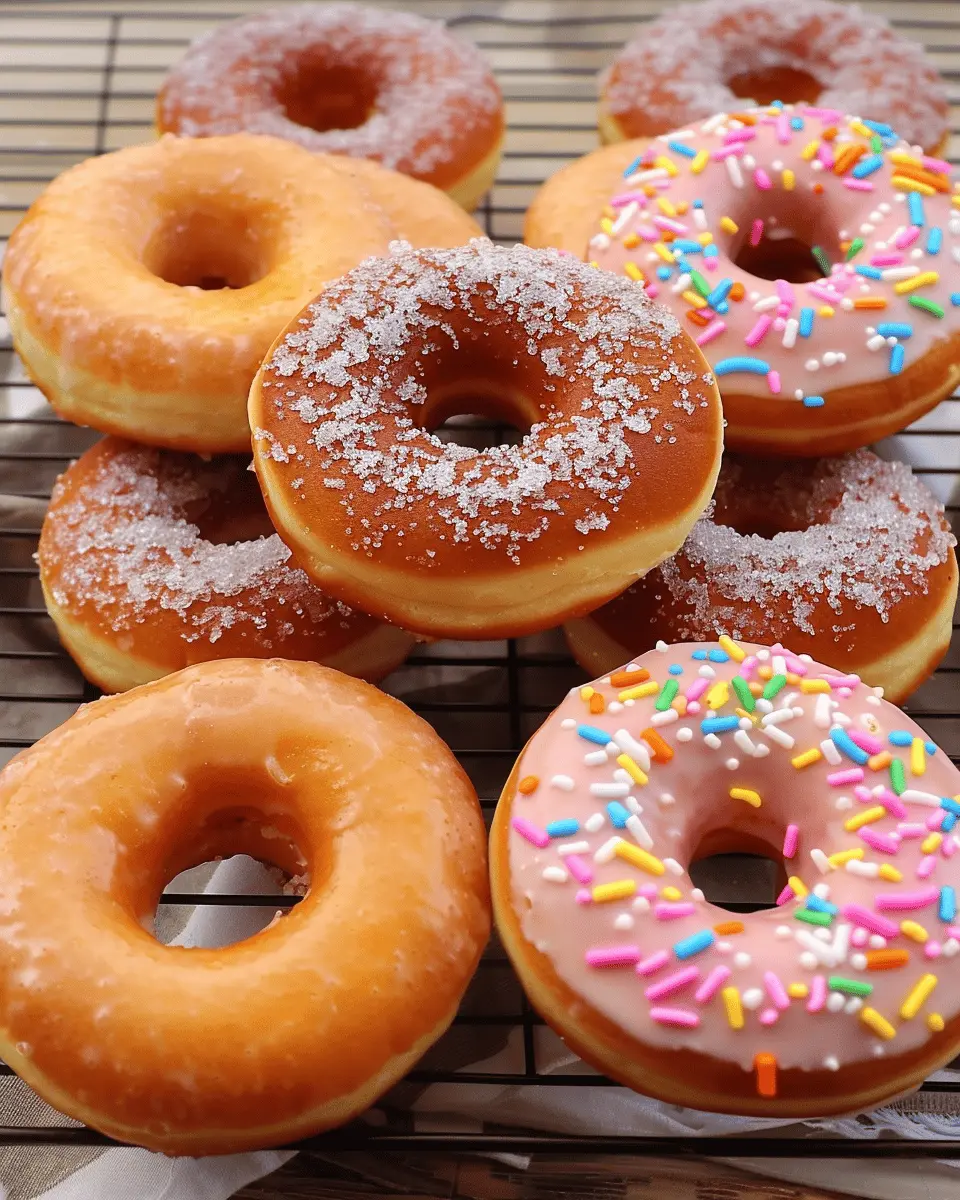
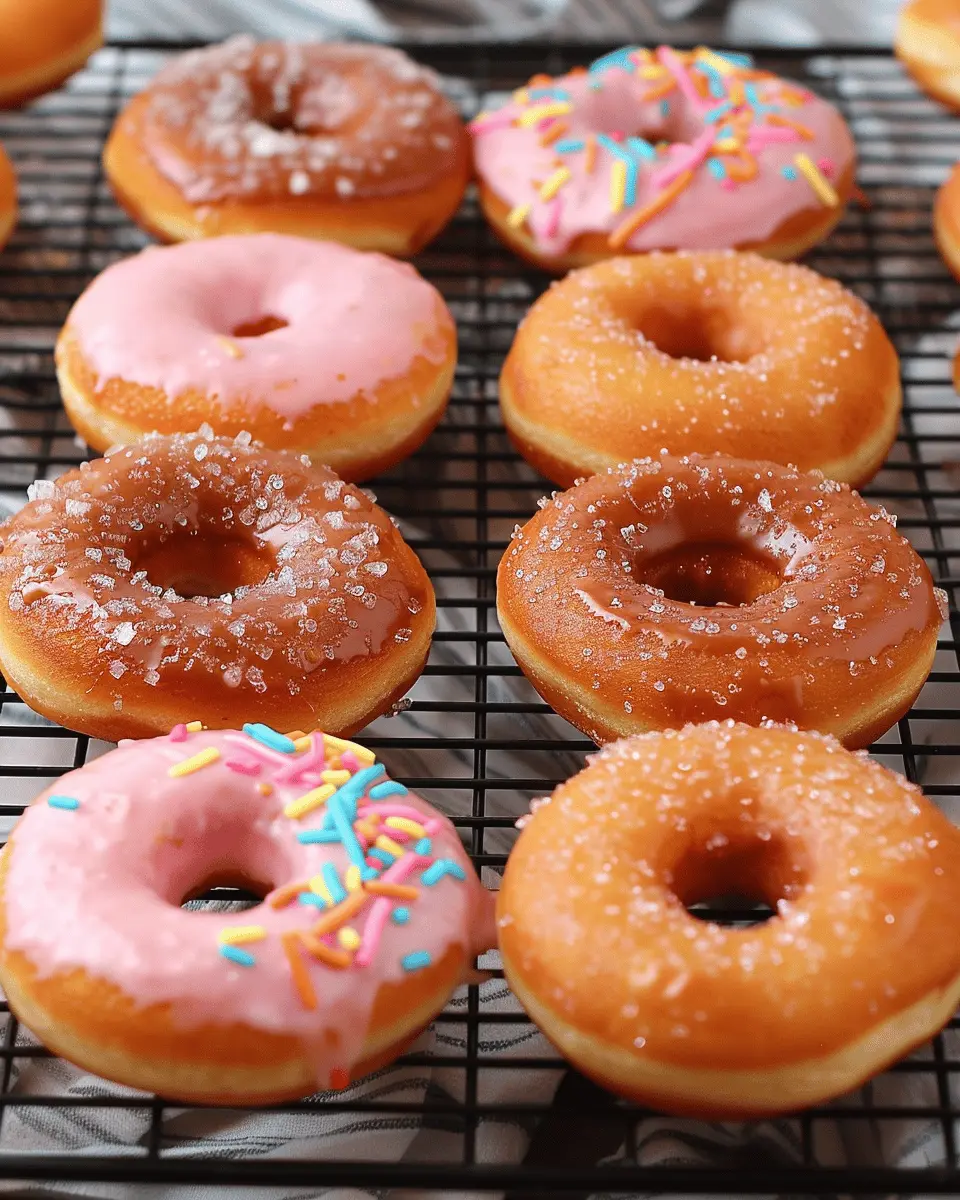
Classic Glazed Donuts
Start with the timeless classic that never goes out of style. Mix powdered sugar with a splash of milk and a hint of vanilla to create a smooth glaze. Dip each donut into the glaze, allowing it to set for a few minutes. These sweet treats taste just like those from your favorite bakery!
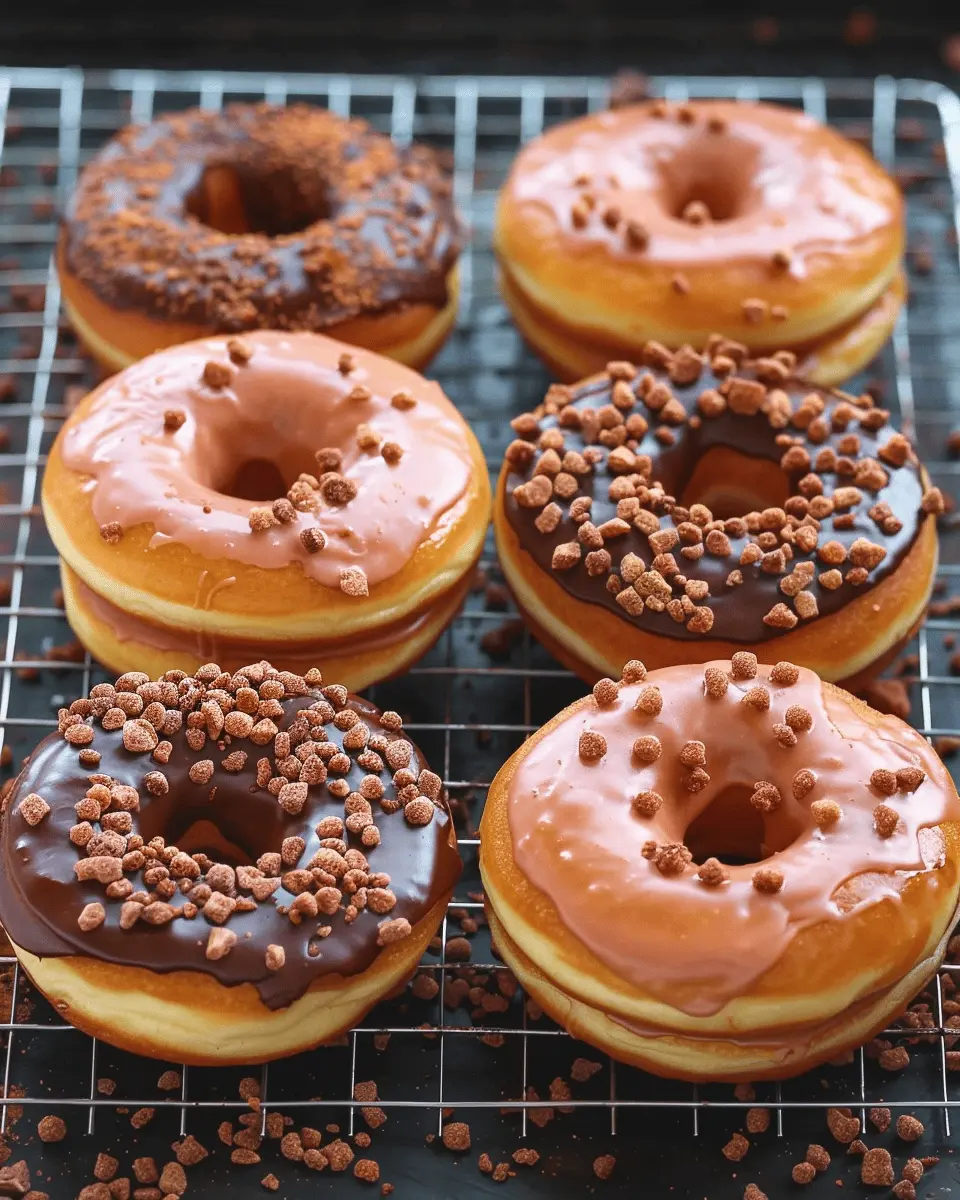
Chocolate-Coated Donuts
For the chocolate lovers, melted dark or milk chocolate can work wonders. Simply melt your chocolate, dip the cooled donuts, and let them set on a wire rack. Add a sprinkle of sea salt or crushed nuts for that extra flair. Did you know that dark chocolate is rich in antioxidants? Now you have an excuse to indulge!
Cinnamon Sugar Donuts
If you’re a fan of warm spices, this variation is for you. Roll your donuts in a mixture of sugar and ground cinnamon as soon as they come out of the oven. The sweet aroma that fills your kitchen will have everyone asking for seconds. Plus, cinnamon is known for its health benefits, including anti-inflammatory properties.
Fruit-Flavored Donuts
Why not add a fruity twist to your No Fryer Homemade Donuts? Incorporate pureed berries or citrus zest directly into your batter for a burst of flavor. Top them with a light glaze made from fresh fruit juice for a refreshing finish. It’s a perfect way to embrace seasonal produce!
These variations are not only easy to customize but also perfect for gatherings or just a cozy night in. Feel free to experiment with flavors and toppings! Your imagination is the only limit. If you want more ideas, check out these resources on baking techniques or donut decorating tips for inspiration!
Cooking Tips and Notes for No Fryer Homemade Donuts
Importance of Ingredient Temperature
When making No Fryer Homemade Donuts, the temperature of your ingredients can greatly impact the final texture and flavor. For the best results, use room temperature ingredients—especially eggs and milk. This helps your batter blend more smoothly, creating a light and airy donut. Cold ingredients can lead to dense donuts, and nobody wants that!
A quick tip: If you’re in a hurry, try warming up eggs in a bowl of warm water for about 10 minutes before using them. You’ll be amazed at how much difference it makes!
How to Know When Donuts Are Ready to Bake
Before baking, it’s crucial to know when your donuts are set for the oven. Look for a smooth, slightly sticky dough that holds its shape when scooped. Use a toothpick test: insert it into the dough; if it comes out clean, they’re ready to bake.
Remember, keeping an eye on your baking time is key! Overbaking can lead to dry donuts, while underbaking can create a gooey center. Aim for a light golden color as your visual cue.
For more in-depth techniques on achieving the perfect homemade donuts, check out this helpful guide on baking tips. Happy baking!
Serving suggestions for No Fryer Homemade Donuts
Pairing with Coffee or Tea
What better way to enjoy your No Fryer Homemade Donuts than with a steaming cup of coffee or a relaxing herbal tea? The rich flavors in coffee can beautifully enhance the sweetness of your donuts, creating a delightful morning ritual. Consider trying a bold roast, like a dark roast or a smooth vanilla bean. For tea lovers, a calming chamomile or robust chai can be the perfect counterpart, adding a unique twist to your donut experience.
If you’re feeling adventurous, why not take it a step further? Folding in spices like cinnamon or nutmeg into your brew can elevate both the beverage and donut flavor profile.
Creative Serving Styles
Donuts don’t have to be served the same way every time. Get creative!
- Donut Stacking: Create a fun dessert tower by stacking your donuts with various toppings in between, like whipped cream or yogurt.
- Donut Sandwiches: Use two donuts to sandwich fillings such as fruit preserves or creamy spreads.
- Donut Charcuterie Board: Arrange a selection of your No Fryer Homemade Donuts on a platter with fresh fruits, turkey bacon, or even chicken ham for a savory twist!
For more inspiration, check out sites like The Kitchn that highlight unique dessert ideas. You’ll find endless ways to make your homemade delights even more scrumptious!
Time Breakdown for No Fryer Homemade Donuts
When it comes to whipping up some delightful No Fryer Homemade Donuts, knowing how much time each step takes can really help you plan your baking adventure. Here’s a quick breakdown:
Preparation time
Getting everything ready will take about 15-20 minutes. This includes measuring your ingredients, mixing the dough, and preparing your baking sheet for these mouthwatering delights.
Rising time
Let your dough rise for approximately 30-45 minutes. This step is crucial for achieving that fluffy texture we all love. Don’t rush this; patience here pays off!
Baking time
Baking the donuts will take around 10-12 minutes in the oven. Keep an eye on them since you’ll want them golden brown and oh-so-delicious.
Total time
In total, you’re looking at around 55-75 minutes from start to finish. Just think about that amazing aroma wafting through your kitchen while you wait!
For more tips on perfecting these donuts, check out sources like King Arthur Baking for expert baking advice. You’ve got this!
Nutritional Facts for No Fryer Homemade Donuts
If you’re craving something sweet but are mindful of your health, understanding the nutritional facts of your treats is essential. Let’s dive into the specifics of our delicious No Fryer Homemade Donuts!
Calories per donut
On average, each donut contains around 120–150 calories. This makes them a guilt-free choice for an occasional indulgence without overshooting your calorie goals.
Sugar content
With about 8–10 grams of sugar per donut, they strike a balance between sweetness and moderation. Using natural sweeteners can also help keep sugar levels in check without sacrificing flavor.
Protein and other nutrients
These donuts provide around 2–3 grams of protein, depending on your recipe variations. If you incorporate whole wheat flour or add ingredients like Greek yogurt, you can boost the protein content even more. Pairing them with nutrient-rich toppings like nuts or yogurt can elevate their health value.
For more detailed nutrient profiles, you can check NutritionData for any specific ingredients you plan to use!
Enjoy your No Fryer Homemade Donuts knowing they are a delightful treat without the greasy guilt!
FAQs about No Fryer Homemade Donuts
Can I substitute ingredients in the recipe?
Absolutely! No Fryer Homemade Donuts are versatile. You can swap all-purpose flour with whole wheat flour for a healthier option. If you’re dairy-free, almond or oat milk can replace regular milk, and you might try using coconut oil instead of butter. Sweeteners can also be adjusted—honey or maple syrup works well in place of sugar. Always taste as you go to find what pleases your palate!
What is the best way to store leftover donuts?
To keep your No Fryer Homemade Donuts fresh, store them in an airtight container at room temperature for up to two days. If you want them to last longer, pop them in the fridge. For extended storage, wrap them individually in plastic wrap and keep them in the freezer. Just remember, they are best enjoyed fresh!
How can I ensure my donuts stay soft?
Keeping your donuts soft is simple! Firstly, don’t overmix the batter; mix just until combined. Secondly, add a touch of sour cream or yogurt to your mixture for added moisture. Lastly, consider a light glaze instead of a heavy icing, as it can help trap that much-desired softness.
Can I freeze these donuts?
Yes! One of the best things about No Fryer Homemade Donuts is their freezability. Freeze them in a single layer on a baking sheet until solid, then transfer to a resealable bag. They can last for about 2-3 months in the freezer. When you’re ready to enjoy them, just let them thaw at room temperature or pop them in the microwave for a few seconds.
For more on the benefits of homemade baking, check out the Baking Association’s Guidelines. Enjoy your donut-making adventure!
Conclusion on No Fryer Homemade Donuts
Embrace the joy of homemade donuts!
Making No Fryer Homemade Donuts at home is more than just a cooking process; it’s an opportunity to create sweet memories. The aroma of freshly baked donuts wafting through your kitchen can elevate any ordinary day into something special. Imagine sharing these delightful treats with friends or savoring them with a warm cup of coffee on a lazy Sunday morning.
Plus, by opting for a no-fryer method, you’re embracing a healthier approach without compromising on flavor. So roll up your sleeves, gather your ingredients, and indulge in the joy of homemade donuts! Visit Serious Eats for more baking tips and recipes to extend your culinary adventures!
PrintNo Fryer Homemade Donuts: Easy Recipes for Irresistible Treats

Delicious homemade donuts made without a fryer!
- Prep Time: 15 minutes
- Cook Time: 12 minutes
- Total Time: 30 minutes
- Yield: 12 donuts 1x
- Category: Dessert
- Method: Baking
- Cuisine: American
- Diet: Vegetarian
Ingredients
- 2 cups all-purpose flour
- 3/4 cup granulated sugar
- 2 tsp baking powder
- 1/2 tsp salt
- 1 tsp ground cinnamon
- 1/2 cup whole milk
- 1/4 cup unsalted butter, melted
- 1 large egg
- 1 tsp vanilla extract
- 1 cup powdered sugar (for glazing)
Instructions
- Preheat your oven to 350°F (175°C).
- In a large bowl, combine the flour, sugar, baking powder, salt, and cinnamon.
- In another bowl, mix the milk, melted butter, egg, and vanilla extract.
- Slowly add the wet ingredients to the dry ingredients, stirring until just combined.
- Pour the batter into a donut pan, filling each cavity about 2/3 full.
- Bake for 10-12 minutes or until a toothpick inserted in the center comes out clean.
- Let the donuts cool for a few minutes before transferring to a wire rack.
- Mix the powdered sugar with a few tablespoons of water or milk to create a glaze, then dip the tops of the donuts into the glaze to coat.
Notes
- For extra flavor, add chocolate chips or nuts to the batter.
- Store leftovers in an airtight container at room temperature.
Nutrition
- Serving Size: 1 donut
- Calories: 150
- Sugar: 10g
- Sodium: 200mg
- Fat: 6g
- Saturated Fat: 4g
- Unsaturated Fat: 1g
- Trans Fat: 0g
- Carbohydrates: 21g
- Fiber: 1g
- Protein: 2g
- Cholesterol: 20mg
Keywords: No Fryer, Homemade Donuts, Easy Recipes, Irresistible Treats