Introduction to Dutch Oven Chili
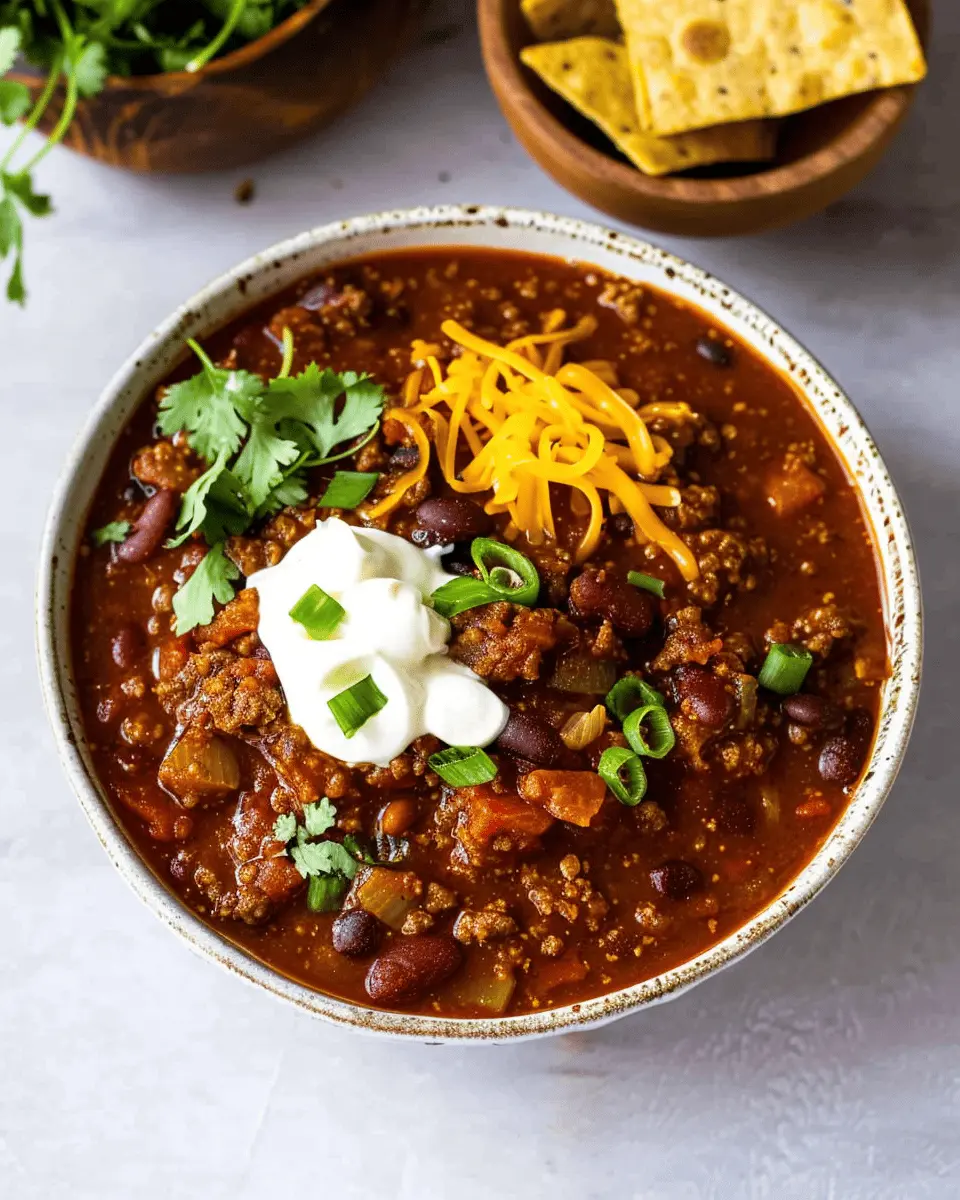
Imagine a warm bowl of Dutch Oven Chili simmering on the stove. The aroma wafts through your kitchen, wrapping you in the comfort of a home-cooked meal. If you haven’t experienced the magic of a Dutch oven, you’re in for a treat. This versatile cookware is ideal for creating hearty dishes, particularly chili, that are perfect for any occasion.
Why Choose Dutch Oven Chili for Your Next Meal?
Dutch ovens are known for their excellent heat retention and even cooking, making them a fantastic choice for crafting a robust chili. When it comes to flavor, slow cooking in a Dutch oven allows the ingredients to meld harmoniously. You’ll find that spices come alive, and the rich flavor profile comes from the long, slow simmering process. Did you know that according to culinary experts, the longer a dish cooks, the deeper the flavors? With a Dutch oven, you can easily achieve this!
Moreover, this meal is incredibly versatile. Whether you’re a fan of classic beef chili or prefer a turkey bacon twist with chicken ham, the possibilities are endless. You can customize your chili based on your dietary preferences or what’s in your pantry. Want to add some beans, diced tomatoes, or fresh veggies? Go for it! A customizable dish means everyone at the table can enjoy their version of Dutch Oven Chili.
Cooking in a Dutch oven is not just about taste; it’s also a fantastic way to bring people together. Picture yourself hosting a cozy dinner with friends, inviting conversations over a bubbling pot of chili. Sharing food creates bonds, and cooking together can be a memorable experience for everyone involved. If you’re looking to impress your friends or simply trying something new on a weeknight, this dish can be a showstopper.
As you embark on this culinary journey, don’t forget the importance of selecting high-quality ingredients. Fresh herbs, quality meats, and even homemade broth can elevate your Dutch Oven Chili to a gourmet experience. For more information on selecting the best ingredients, check out resources from culinary schools or cooking classes.
So, ready to dive into the world of Dutch Oven Chili? Let’s get cooking!
Ingredients for Dutch Oven Chili
When it comes to making a serious bowl of Dutch Oven Chili, the choice of ingredients can make all the difference. This hearty meal isn’t just about filling your belly; it’s an opportunity to experiment with flavors and textures. Here’s what you’ll need:
- Protein: Choose 1 pound of beef (ground or diced, your preference!) and 4 ounces of Turkey Bacon for some extra flavor.
- Fruits and Veggies: Start with 1 large onion, 2 bell peppers (your choice of color), and 4 cloves of garlic, finely chopped. Add 1 can of diced tomatoes (14.5 ounces) and 1 can of kidney beans.
- Liquids: Don’t forget 2 cups of beef broth and 1 cup of tomato sauce for that perfect consistency.
- Spices: A mix of chili powder, cumin, and smoked paprika will bring the heat—adjust to your taste!
- Extras: A splash of apple cider vinegar enhances the overall flavor, adding a delightful zing.
Ready to cook? Grab your ingredients from your local grocery store or check out fresh options at farmers’ markets. This simple preparation sets the stage for a chili that will be the talk of your next gathering! For more tips on keeping your meals both delicious and nutritious, you can explore reputable sources like Healthline.
Step-by-step Preparation of Dutch Oven Chili
Cooking a hearty Dutch oven chili is not just about following a recipe—it’s an experience filled with rich, warming flavors. With each step, you’ll not only build the dish but also fill your kitchen with what I like to call “the aroma of happiness.” Let’s dive into how you can prepare this delightful chili, step by step.
Gather and Prepare Your Ingredients
Before you jump into the cooking process, make sure you have everything you need. Here’s a list of the basic ingredients required for a delicious batch of Dutch oven chili:
- 1 pound of ground beef
- 4 oz of turkey bacon, diced
- 1 can (14 oz) of chicken ham, diced
- 1 medium onion, chopped
- 3 cloves of garlic, minced
- 1 bell pepper, diced (red or green)
- 2 cans (15 oz) of beans (like kidney and black beans)
- 1 can (14 oz) of diced tomatoes
- 2 tablespoons of tomato paste
- 2 cups of beef broth
- 1 tablespoon of chili powder
- 1 teaspoon of cumin
- Salt and pepper to taste
Having all your ingredients prepped and ready to go makes the process smoother and more enjoyable. You might even want to look at this guide on how to properly chop vegetables to maximize efficiency and minimize waste.
Sauté the Base in Your Dutch Oven
Once your ingredients are prepped, heat your Dutch oven over medium heat. Add the diced turkey bacon and allow it to cook until crispy. This step is crucial; the turkey bacon will provide a wonderful depth of flavor and a slight smokiness to the chili.
- After about 5–7 minutes, toss in the chopped onions and bell peppers.
- Cook for another 5 minutes until they’re softened and translucent.
- At this point, add the minced garlic and sauté for an additional 1–2 minutes, or until fragrant.
The sautéing process not only builds flavor in your Dutch oven chili, but it also gets your taste buds excited for what’s to come.
Brown the Meat and Incorporate the Spices
Now that your base is sautéed to perfection, it’s time to add the ground beef. Break it up with a wooden spoon and cook until it’s browned all over (approximately 5–8 minutes).
Once the meat is browned, sprinkle in your chili powder, cumin, salt, and pepper.
- Stir well to combine all the flavors.
- This is an important step that allows the spices to bloom and infuse the meat, elevating your Dutch oven chili to the next level.
For a little extra kick, consider whether you’d like to add jalapeño or cayenne pepper at this stage!
Add the Tomato Products and Beans
With the meat seasoned to perfection, it’s time to introduce the star ingredients: the tomato products and beans. Pour in the diced tomatoes (along with their juices), tomato paste, and the beef broth.
Next, add your canned beans—make sure to drain and rinse them before adding.
- Gently stir these ingredients together until evenly combined.
- Let them mingle and immerse in the rich mix of flavors you’ve created.
Adding beans not only enriches the chili but also gives it that satisfying heartiness. And if you’re a fan of extra texture, you may want to add sweet corn or additional veggies at this point.
Simmer to Perfection
The last and final step is to let your Dutch oven chili simmer and develop those incredible flavors. Lower the heat and cover your Dutch oven, letting it cook for about 30 minutes to an hour. This slow cooking process intensifies the flavors and allows them to meld beautifully.
Stir occasionally, and feel free to taste and adjust seasonings as necessary. The longer it simmers, the better it gets!
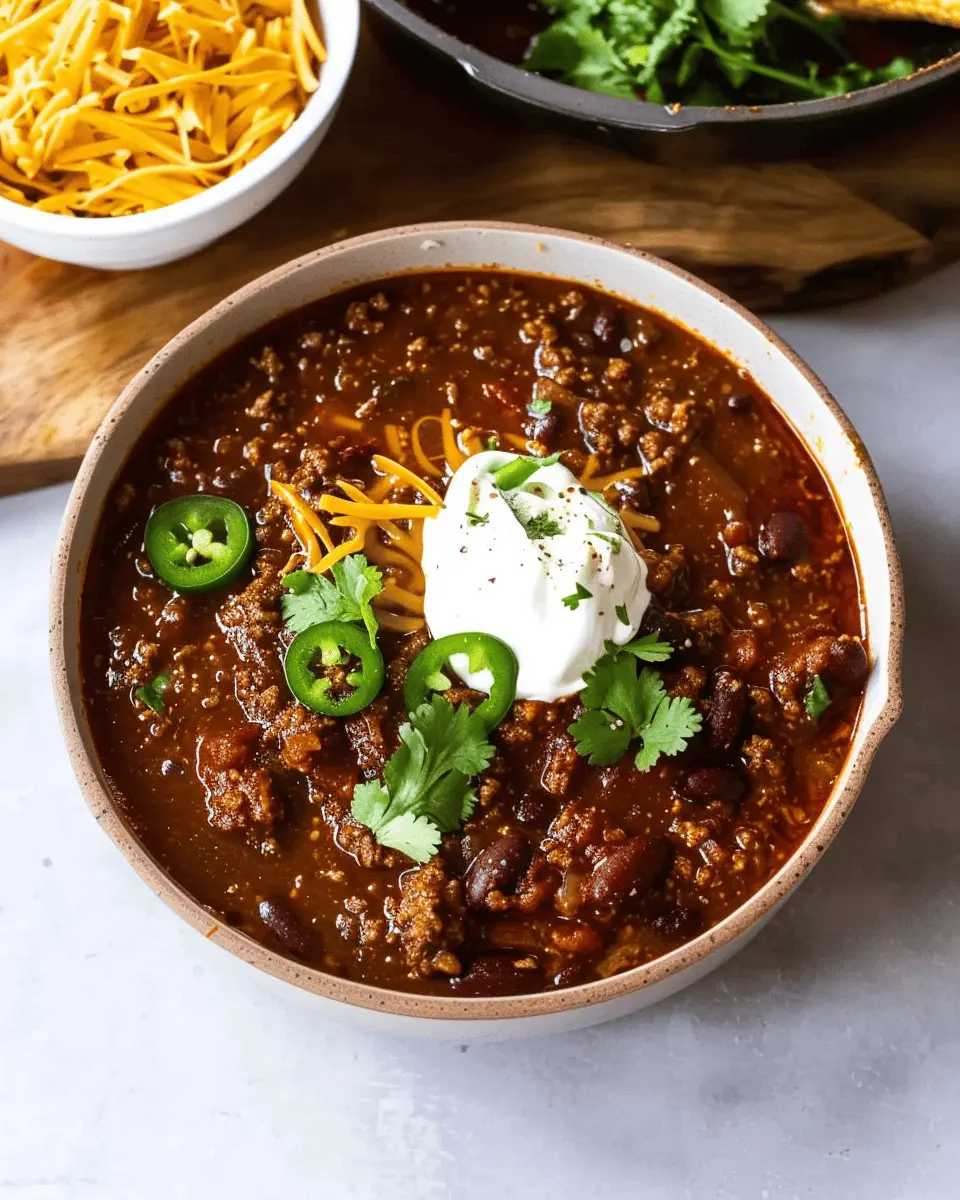
In the end, what you’ll have is a comforting, bold, and utterly delicious chili that warms your soul. Serving it with your favorite toppings—like shredded cheese, sour cream, or chopped green onions—will truly take it to the next level.
So, are you ready to elevate your home kitchen game? Grab your ingredients and your Dutch oven; a delightful experience awaits you!

Variations on Dutch Oven Chili
Vegetarian Chili Option
Looking to shake things up with a Dutch Oven Chili that’s completely meat-free? You’re in luck! A vegetarian chili can be just as hearty and satisfying. Start by replacing the ground beef with a mix of your favorite legumes like black beans, kidney beans, and lentils. Adding vegetables such as bell peppers, zucchini, and corn will enhance texture and flavor. You can also toss in some diced tomatoes, onions, and a blend of spices to bring everything together.
For an added depth of flavor, consider using vegetable broth instead of water. This option not only makes your chili vegan-friendly but also packs it with nutrients. Be sure to check out sources like The American Heart Association for more ideas on healthy, plant-based meals!
Spicy Chili with Added Heat
If you’re a spice enthusiast, take your Dutch Oven Chili to the next level with a bit more heat! After sautéing your aromatics, add diced jalapeños or serrano peppers to kick things up a notch. A touch of chili powder or cayenne pepper will also do wonders.
For an aromatic punch, try incorporating spices like smoked paprika or crushed red pepper flakes. You might also consider drizzling a bit of hot sauce into your simmering chili for that extra zing. Just remember, you can always adjust the spiciness to your taste, so start with a little and build it up!
With these variations, your Dutch Oven Chili can easily cater to both meat-lovers and those seeking a lighter, plant-based option. Whichever version you choose, you’re sure to impress your friends over a cozy dinner.
Cooking Tips and Notes for Dutch Oven Chili
How to Avoid Common Mistakes
When making Dutch Oven Chili, it’s easy to run into a few hiccups. One common mistake is not browning the turkey bacon or beef thoroughly. This step enhances flavor and ensures a depth that makes your chili memorable. Also, be mindful of cooking the vegetables until they’re just tender; overcooking can lead to a mushy texture.
Another tip? Don’t rush the simmering process. Allow your chili to cook low and slow; patience is key to developing those rich, layered flavors.
Best Practices for Flavor Enhancement
To elevate your Dutch Oven Chili, consider adding a splash of beef broth or vegetable stock instead of water. This small change can dramatically enhance savoriness. Fresh herbs like cilantro or parsley sprinkled in just before serving can brighten the dish.
Finally, experimenting with spices can lead to delightful surprises. Add a pinch of cocoa powder or espresso for a deeper flavor that truly captivates the palate. Interested in more ideas on flavoring your chili? Check out this expert’s guide on spices for even more inspiration!
Serving Suggestions for Dutch Oven Chili
Pairing with sides and garnishes
When it comes to serving your Dutch Oven Chili, think about complementing those rich, savory flavors with the right sides and garnishes. Here are some ideas to elevate your chili experience:
- Crusty Bread or Cornbread: Perfect for dipping, these options absorb the delicious broth while adding a delightful crunch.
- Fresh Cilantro or Green Onions: A sprinkle of these toppings adds a burst of freshness that balances the richness of the chili.
- Cheddar Cheese: Melting some cheese on top can take your chili to the next level, adding creaminess that everyone loves.
- Sour Cream or Greek Yogurt: A dollop of either provides a cooling contrast to the heat.
If you’re looking for a refreshing beverage, try pairing your Dutch Oven Chili with homemade lemonade or iced tea.
Ideal occasions for serving chili
Dutch Oven Chili is perfect for a variety of gatherings:
- Game Day Parties: Whether you’re cheering for your favorite team or just enjoying the moment, chili is the perfect crowd-pleaser.
- Family Dinners: It’s comforting and filling, making it a go-to option for cozy nights at home.
- Potluck Events: Easy to transport, everyone loves a good chili, and it often disappears quickly!
Remember, chili is versatile and adapts beautifully to any occasion. For a detailed guide on serving snacks at gatherings, check out Good Housekeeping’s suggestions. Whatever the event, your Dutch Oven Chili is sure to impress!
Time Breakdown for Dutch Oven Chili
Preparation Time
Getting started with your Dutch Oven Chili is half the fun! You’ll want to set aside about 15 minutes for chopping veggies and prepping your ingredients. Think about dicing onions, bell peppers, and slicing the Turkey Bacon for that savory flavor.
Cooking Time
Once everything’s prepped, it’s time to bring the heat. The cooking process will take around 1 hour and 15 minutes. This includes browning your beef, simmering your beans, and letting those wonderful flavors meld together.
Total Time Needed
In total, you’re looking at about 1 hour and 30 minutes from start to finish. Yes, it might sound like a while, but the hands-off simmering phase allows you to relax or prep some tasty toppings.
For more tips on timing and ingredient choices, check out this helpful guide on meal prepping. You’ll find making dinner as easy as it is delicious!
Nutritional Facts for Dutch Oven Chili
Calories and Servings
A hearty serving of Dutch Oven Chili typically clocks in around 300-400 calories, depending on the ingredients you choose. Made to satisfy, this dish usually serves about six people, making it perfect for weeknight dinners or meal prep for the week ahead. Each bowl is packed with protein-rich ingredients like turkey bacon and Chicken ham, which not only keep you full but also add an extra layer of flavor.
Important Nutrients
Not only is Dutch Oven Chili delicious, but it also boasts several important nutrients. Here’s what you can expect:
- Protein: Thanks to turkey bacon and Chicken ham, you get a protein boost to support muscle health.
- Fiber: The beans and vegetables deliver plenty of fiber, promoting digestive health.
- Vitamins and Minerals: Ingredients like tomatoes and bell peppers provide a rich source of vitamins A and C, essential for immune function.
For more details on the nutritional benefits of beans, check out The Bean Institute. You can turn your Dutch Oven Chili into a fulfilling meal that’s nutritious, comforting, and perfect for sharing with friends or family.
FAQs about Dutch Oven Chili
What’s the difference between chili and stew?
If you’re pondering the distinction between chili and stew, you’re not alone! The primary difference lies in their ingredients and consistency. Chili, especially when made in a Dutch oven, typically features ground beef, beans, tomatoes, and spices, creating a hearty, spicy dish. On the other hand, stew includes larger chunks of meat and vegetables cooked slowly in a broth. Think of chili as a more concentrated, bold-flavored cousin of stew. For some great insights on the nuances of these two dishes, you might want to check out this article from Taste of Home.
Can I make chili ahead of time?
Absolutely! Making Dutch Oven Chili ahead of time is not only practical but also enhances the flavors. Allowing the chili to simmer and meld overnight can result in a more delicious dish. Just be sure to cool it down to room temperature before refrigerating, and it can last in the fridge for up to five days. Perfect for meal prep!
How do I store leftover chili?
Storing leftover Dutch Oven Chili is simple! Transfer any leftover chili into an airtight container and refrigerate. It’s great for lunches or dinner later in the week. If you want to keep it for even longer, consider freezing it—the chili can last up to three months in the freezer. Just thaw in the fridge overnight before reheating. For those curious about safe storage practices, the USDA has excellent recommendations on their site.
By keeping these tips in mind, you can enjoy your Dutch Oven Chili longer and optimize your cooking experience!
Conclusion on Dutch Oven Chili
Recap the Joy of Homemade Chili
There’s something truly special about a Dutch Oven Chili simmering away on a chilly evening. The aroma that fills your kitchen not only warms your heart but also brings a touch of nostalgia, reminding many of gathering around the table with loved ones. Using fresh ingredients like Turkey Bacon and Chicken Ham elevates this dish, allowing you to savor each bite fully.
Whether you’re a seasoned chef or a kitchen newbie, making your own chili can be a fulfilling experience. As you enjoy your hearty bowl, consider inviting friends over for a chili night, sharing stories, and perhaps even experimenting with different toppings. Want to dive deeper into the world of chili? Check out this Ultimate Guide to Chili for inspiration!
PrintDutch Oven Chili with Turkey Bacon and Chicken Ham Delight

Enjoy a hearty and flavorful Dutch Oven Chili made with turkey bacon and chicken ham, perfect for cozy nights.
- Prep Time: 15 minutes
- Cook Time: 45 minutes
- Total Time: 1 hour
- Yield: 6 servings 1x
- Category: Main Dish
- Method: Stovetop
- Cuisine: American
- Diet: Low Carb
Ingredients
- 1 pound ground turkey
- 4 slices turkey bacon
- 1 cup diced chicken ham
- 1 can kidney beans
- 1 can diced tomatoes
- 1 medium onion, chopped
- 2 cloves garlic, minced
- 1 tablespoon chili powder
- 1 teaspoon cumin
- 1 teaspoon paprika
- 1 handful fresh cilantro, chopped
- Salt to taste
- Pepper to taste
Instructions
- In a Dutch oven, cook the turkey bacon until crispy. Remove and set aside.
- In the same pot, brown the ground turkey and onion until the turkey is cooked through and the onion is translucent.
- Add garlic, chili powder, cumin, and paprika. Stir for 1-2 minutes.
- Add kidney beans, diced tomatoes, and chicken ham. Bring to a simmer.
- Chop the cooked turkey bacon and stir it into the chili.
- Season with salt and pepper to taste.
- Simmer for 30 minutes on low heat, stirring occasionally.
- Garnish with fresh cilantro before serving.
Notes
- For extra heat, add diced jalapeños or cayenne pepper.
- Can be served with cornbread for added texture.
Nutrition
- Serving Size: 1 bowl
- Calories: 350
- Sugar: 2g
- Sodium: 800mg
- Fat: 15g
- Saturated Fat: 4g
- Unsaturated Fat: 10g
- Trans Fat: 0g
- Carbohydrates: 30g
- Fiber: 8g
- Protein: 30g
- Cholesterol: 70mg
Keywords: Dutch Oven Chili, turkey bacon, chicken ham, chili recipe